The best way to Build Closet Shelving Without Wall Studs

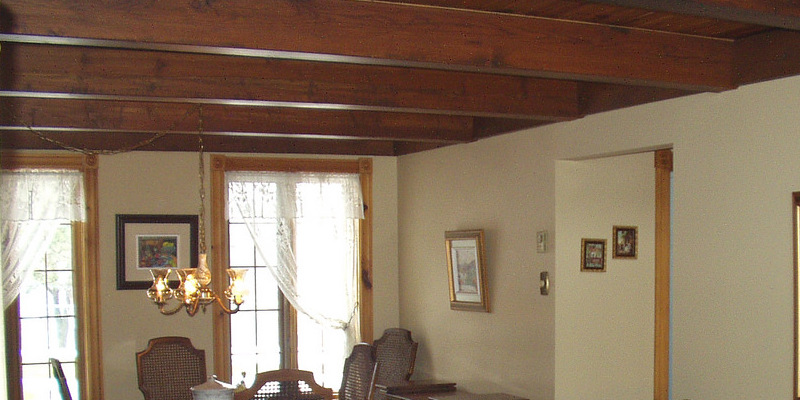
Shelves are typically anchored to the wall where wall studs can be grabbed by the screws. If you can`t find studs, or in case your wall doesn`t have any, you can nevertheless build closet shelves. However, screwing shelving brackets through slender dry wall might ultimately trigger the shelf to drop because dry wall can`t help the fat. Paneling or thick plaster partitions may bury studs also deep, creating the studs inaccessible. In case your walls are masonry, you probably don`t have studs in any way. You will require techniques and the appropriate components to create a stud- closet shelf. It is possible to design shelving to fit your needs using the same techniques, after installing one shelf.

Where you want a shelf measure left to right on the other side of the region.

Choose the kind of bolts required for the wall. As an example, in the event the wall is plaster, dry wall or paneling, use toggle bolts or bolts. Molly bolts are bolts as you tighten the bolt using a sleeve that increase behind the wall. Bolts have a butterfly- toggle that tightens and opens from the back side of the wall as you tighten the bolt. Use screws in the event the wall is masonry, including brick or block. The heads should be big enough to avoid the screws, although bolts or screws should be small enough brackets.

Determine brackets you require. At minimal, use one bracket about 6″ in from every end of the shelf. Include one bracket in the middle or brackets spaced in the event the shelf is going to be very lengthy.

Measure one edge of a bit of 1 inch by 12-inch medium-density fiber-board or shelving board that is laminated to the shelf size measurement. Mark the edge of the board using a pencil.

Set a carpenter`s square on the board using the quick lip of the square contrary to the edge as well as the 90-diploma corner of the square in the pencil mark. Trace the fringe of of the square throughout the board, producing a-line straight-out in the pencil mark.

Cut the shelf board across in the line, using a round saw.

Place A4-foot le Vel horizontally from the closet wall in the peak. Adjust one end-of the le Vel before the bubble is centered, then t-Race the fringe of of the le Vel on the wall. Mark where each shelf bracket is likely to be installed.

Align the fringe of of one shelf bracket together with the level pencil line. One leg of the bracket ought to be pointing downward and flat contrary to the wall; the leg of the bracket should stage outward that is straight. Trace all the screw-holes in the bracket on the wall, utilizing a pencil. Repeat for every single bracket.

Drill a hole through the wall a-T every mark. Use an Savannah electrical drill having a drill bit this is the sam-e diameter as your bolts. In case your partitions are plaster, dry wall or paneling, use a drill bit that is typical. Use a masonry drillbit in the event the wall is masonry.

Set one bracket from the wall. Align the hole openings together with the proper holes in the wall.

Slip one screw through one of the screw-holes in the bracket and to the holeinthewall or bolt. Tighten it having a Phillips screw-driver bit as well as a power drill. Slip the sleeve and bolt device through the opening. For bolts, squeeze the butter-Fly wings and slip the bolt. Fasten the bolts in every single bracket.

Sand the cut ends by-hand with great- sandpaper or a sanding sponge, if essential.

Place the shelf.

See related

The best way to Tint Panes

Tinting your windows is a a powerful way to solution to reduce the harsh rays of the sun and keep your house cooler in warm summer months. Many houses, particularly those in places know for severe climate, have twin-pane windows. This type of window includes two items of glass. The additional pane gives protection against rain, sleet, snow and winter. That stated, tinting this kind of window needs a movie that is rated “twin-pane risk-free” to avoid any possible harm.

The peak of your window by its own width to look for the part of window tint you may need.

Prepare your solution. Mix four drops of baby shampoo. Pour the solution into a spray bottle that is plastic.

Place a dropcloth underneath the window to protect your flooring. Cover the wall just just beneath the window as well as the window ledge.

Clean the glass of dirt and grime. Wet the glass with answer. Use a straight-razor to scrape off any stickers or paint. Carefully run a refreshing razor on the glass to get cleared of any residue when the glass is clear. Spritz with answer wipe and squeegee bone-dry along with your lint-free paper towels.

Measure your tint movie to to match the dimensions of your window. Allow one-inch of materials that is additional on all sides for possible errors. Cut to size.

Begin at one corner and remove the protecting liner of the film’s.

Spray the whole adhesive aspect of the movie along with your spray that is mounting. It’ll be easier to to put in case the adhesive is completely moist.

Place the adhesive side of the film on placement and your glass.

The movie with squeegee it and mounting remedy, functioning until each of the extra mounting remedy out to the edges in the guts of the film was squeezed out.

Trim the excessive movie by means of your utility knife. Use the straightedge as your manual and reduce each aspect in one easy movement.

Spray the window with squeegee and remedy with strain to eliminate extra answer or any bubbles.

See related

From Blowing in Vents the best way to Keep Rain

Attic vents keep your house comfortable as well as in excellent situation by enabling humidity and warmth to dissipate to the the outside. Within a rain storm, rain may be blown by winds through the attic vents in your house. This additional moisture fuels the development of mould and mildew causes wood injury and can destroy products that were saved. From blowing in attic vents, keeping rain needs several hours of of energy but might save the expense of costly repair charges to you.

Securing Vents

Loose vent addresses makes it possible for rain to blow to the attic. Use a ladder to gain access to the vent and tighten the screws of the cover using a screwdriver. You might want to include extra screws to to keep the vent protect securely because most handles are connected only in the corners. Use an electric drill to drill one hole in the midpoint of every side of the vent, then use 3/4 inch wood screws to secure the cover.

Flashing

They are strengthened by adding sheetmetal to the seams of your handles and increases their capacity to keep out rain. Select sheetmetal of the same thickness as your vent protect. Cut four pieces of sheet steel to to match the perimeter of the cover, enabling 1-inch of overlap at every corner and every seam. Use a drill as well as sheet-metal screws to secure the sheet-metal flashing to the cover.

Deflectors

Place a deflector on the opening of the vent to keep rain. Deflectors are available in configurations, several sizes and colours to coordinate with your current vent protect. Select a cover manufactured from stainless metal for outside use. Use sheet-metal screws to mount the deflector on the attic vent protect.

Screening and Caulking

Measure width and the length of the attic vent protect. Access the the inner aspect of the attic vent. Cut an item of 0.17-millimeter gauge metal screening somewhat bigger than the dimensions of the attic vent protect. Mount the screening joists utilizing a gun. Use a ladder to eliminate the attic vent protect and use a staple gun to secure the screening to the protect, in the event you CAn’t access the attic inside. Reattach the protect that is vent.

See related

The best way to Level a Stove Top

A stove that is wobbly makes cooking even the easiest dishes a dangerous exercise. Level an stove to prevent food spills and burns off that are possible. The stove-top it self is not crooked, but low-hanging crooked and cabinetry floors are producing the illusion of an equipment that is uneven. Rule out these possible carpentry problems by creating the required changes and examining the level of your stove. This easy home upkeep repair requires only a few several minutes as well as tools.

Turn the circuit-breaker off to the stove. In the event that you are unsure which breaker controls the stove, pull the stove to gain access to the plug out and unplug it from your wall.

Examine the edges of the stove-top. Push back on the stove-top that is great to ensure the lid is protected. An uneven area is created by an lid.

Place an amount in the middle front of the stove-top that is great. Look in the level to find out the bubble floats. The bubble should rest in the middle of the level. Change the side of the stove in the event the bubble leans to the left. Change the equipment right-side in the event the bubble leans to the right.

Open an adjustable wrench and clamp it on to the front right or left leg. Tighten the clamp lower and to elevate the stove. Look in the level where the bubble rests to find out.

Place a flat washer underneath the stove leg that is crooked. Use a hand-truck to raise the stove somewhat while the washer is placed by a buddy underneath the leg. Look in the bubble to confirm that it’s resting in the middle.

See related

The best way to Remove Laminate Tiles

Tiles are basically self- tiles which can be applied to your wooden or other substrate ground. Typically, the ground is cleaned completely as well as the tiles are trapped down onto the flooring that was cleaned. Sometimes, for a more durable and expert tile software, ground mastic is used and the tiles are put over that. By scraping with either program, the only option there’s for elimination is. The method that you decide to do this is the decision.

Pry a benefit on the flooring up. A pry-bar is useful for this. Ideally, start in a doorway. You don’t have to to pry the whole tile up — sufficient that it will be suit beneath by a scraper blade.

Choose a scraper. A scraper that is guide is a blade at the conclusion of a handle. This may require lots of labor. An Savannah, GA Electrical Repair scraper is an attachment to get a saw. Slide the attachment to the port that is blade, start the observed together with the handle facing outwards, which puts the blade that is scraping right into a position, and guide the blade underneath the the tiles. Although utilizing a power scraper such as this can take less time to scrape the tiles up, you’ll be on your knees practically the whole time. When selecting which kind of scraper to use take that bodily element into account.

Guide the blade underneath the the tiles that are laminate. The tiles will come up fairly easily, if only adhesive was used. If your mastic was used, both the mastic and also the tile will require to be eliminated before still another sort of flooring is placed down.

Place every one of the aged scraped-up tiles in their own rubbish container that is split up. Contact your neighborhood trash supplier to locate out if there are any restrictions for accumulating laminate tiles if relevant, or the mastic that has been used.

See related

The best way to Attach a Cork Liner to Shelves

Lining your shelves offers a cushioned and slip-resistant surface to help protect your plates and glasses. Cork, a normal moisture absorber resists mildew and mold, which is useful before storing them in your cupboard, should you not dry your dishes well. The self adhesive backing make them easy to install; it stays in place, unlike some plastic, non adhesive shelf liners.

Measure duration and the width of all shelves you want to protect. The finest cork shelf liner for the work are at least an inch wider than your shelves; it is simpler to reduce to to match rather than attempt to to stick a little strip of cork to fill in. Seem at the size of the rolls of cork liner, and purchase enough to line the size of all your shelves.

Remove any dishes out of your shelves and wipe the shelves clean using a moist rag. Allow the shelves to dry totally.

Measure the specific dimensions including hurdles like notches around wood, of every shelf supports. Draw a diagram of every shelf on newspaper pages, taping webpages together if required to to make the shape of your shelf.

Cut the diagrams out then lay them to ensure an exact match. Trim where required.

Unroll some cork lining. Lay the newspaper templates in place on top and tape, then slice the the cork lining to coincide with the template. Use a straight edge to help keep the cut-lines straight. Lay the cork lining on the shelf to guarantee a correct match.

Peel back the adhesive along one edge of the liner, eliminating between 6 and 12″ of adhesive. Line the corner of the liner up and press down. Slide your hand over the outer edge that is quick, making liner lines up using the shelf edge. Press outward toward the liner that is remaining.

Peel straight back 6-to-12-inch sections of backing in an occasion and press the cork to the shelf before the whole liner h AS adhered. Peeling straight back parts of of backing aids helps maintain the cork from inadvertently staying with the incorrect section of shelf or it self. Repeat the procedure with all the shelves.

See related

The best way to Sand Moulding

When it’s been a while because you have painted or stained your moulding, you will need to sand the area carefully to remove blemishes and paint. Over time, ornate details can be hidden by several coats of paint on such structures, and globs and drips of paint could have gathered in crevices that are specific. Sanding the moulding down to its unique area before staining or painting will guarantee that individuals see elegance and the craftsmanship of the molding rather of any imperfections.

Put on a respirator as well as protective eyewear. Lay down a drop cloth or newspaper in the workshop, in the event the moulding is along the ceiling and set up a ladder.

Plug in a vacuum using a hose attachment and start. Climb the ladder cautiously while keeping the attachment (or have someone hand you the attachment when you have climbed up). Suck up cobwebs and dirt across the moulding. For foundation moulding, use the hose attachment to suck up dirt where the ground is met by the moulding.

Set the vacuum apart when completed, and fill a bucket with water and soap. Place the bucket on the most effective portion of the ladder or on the ledge of the ladder if there is no ledge.

Scrub the moulding using a sponge dipped until clear of any dirt in the water. Dry using a towel when completed.

Sand the moulding with three grits of sandpaper. Start with 80-grit sandpaper to remove the big and paint scratches and blemishes. Move onto the 120-grit sandpaper to buff out the scratches made up of the 80-grit sandpaper. Finish using a 220-grit sandpaper to produce an area that is smooth on the moulding. No scratches should be obvious now.

Brush a way sanding dust using a clean paint brush as-needed. Following the sanding is finished, wipe the area entirely using a tack cloth.

See related

The best way to Remove the Stick On Tile Glue

Self- linoleum floor tiles make flooring jobs simple and fast, but the residue left in the event that you eliminate the tiles and only a various type of flooring, left left out may be a eyesore that is messy. When eliminating adesives it is best to avoid chemicals and abraisive cleaners. In case your sub-floor is wood that is normal, employ a specialist to make sure your unique floors are not broken during the elimination procedure. Having a little time and elbow grease, the flooring in your investment could possibly function as eye-attractive floorcovering it was created to be.

Fill a bucket with warm water out of your water tap. Do not use water that is boiling or you risk harming toes and your fingers throughout the elimination procedure. Enough water to cover about a 5-by-5 foot area of of flooring. Allow the water to penetrate the linoleum adhesive.

Wipe up the stick on glue using a cloth or mop that is soft. Rinse the fabric or mop whenever you wipe the ground area. Otherwise, you risk spreading the adhesive back on the ground again. Repeat the warm water program before you have covered the whole ground location, and mopping.

Leftover glue, which ought to still be using moist a putty knife or long handled garden edger. Take care scrape or to not gouge the sub-floor along with your device that is scraping. It is possible to scrape with increased abandon in case your sub-floor is concrete. Add water to the ground area while you are scraping if it gets dry.

If water does not eliminate the linoleum adhesive add a tiny amount of citrus solvent to the water. The solvent is not damaging if you you follow the directions on the bottle and is accessible at most of the hardware retailers. Use the solvent and water combination to the ground where you sense or see adhesive that is remaining. Scrape having garden edger or a putty knife to eliminate the glue.

See related

The best way to Glaze a Wood Door

So you’ve just invested times re-finishing your exhausted and weathered front wood door, but nonetheless, it nevertheless seems cool and un-inviting to guests or to passersby. By glazing the door one way to warm up the entry way in your house and include to the curb charm is. Glazing is an method that provides character. Shade is left by it in crevices, the nooks and pores of the wood to simulate mild aging. Do-it-yourself homeowners will see the glazing method is simple and may easily be accomplished in one weekend that.

Pick out the door. By inserting the tip of a screw-driver to the underside of the hinge remove the pins and tap the screw-driver using a hammer. The tip of the screwdriver under spot when the very top of the pin appears 1/2 inch above the top of the hinge, continue to the pin is totally of the hinge. tap the screwdriver until Repeat the procedure using the hinges that are remaining.

Lay the door flat across several sawhorses. Tear off pieces of masking tape and tape on the door-knob, hinges and other components such as doorknocker or the kick plate.

Sand the door with 320-grit sandpaper. This assists to roughen the wood up and produce a texture, allowing the glaze to follow the wood. Wipe the door using a clean rag to remove the dirt that has been created in the sanding down. Examine the area. Repeat the procedure, in the event that you can nonetheless see gloss in the sealer.

Protect your hands. Mix after which apply a generous quantity of glaze within the surface having a brush. Start a T one corner of the function and do-or sideways toward the other corner. In the event panels have been elevated by the door, be certain to poke the brush to the edges of the panels.

Wipe the glaze off using a clean rag when you not ice the glaze is commencing to seem boring. Wipe then and together with the grain contrary to the grain to function the glaze to the pores of the wood also to remove the excessive glaze from your smooth, flat aspects of the door. Allow mo-Re of the glaze to stay in in the grain of the wood for the appear as well as in the crevices; the a-Mount you abandon is an individual selection.

When the glaze h AS dried, brush on a polyurethane sealer. Typically, the time is between two and five hrs but can differ depending on le Vel and the air temperature of humidity. Use extended strokes and go together with the grain of the wood. Allow the do or to dry 2-4 hrs and after that repeat the procedure for the other facet. Remove the tape and re-hang the do or.

See related

The best way to Tear Out Drywall

Drywall is an affordable, light-weight and simple-to-manage materials that will quickly change studs or concrete right into a wall that is completed. It requires other as well as paint, wall paper decorations for the last contact. It is possible to just as easily tear-out the dry wall in the event that you if you want to to transfer a wall or alter the look of one.

Locate an area of dry wall that’s a way from any other or studs behind-the-wall utility. It’s possible for you to use a stud finder to to find these areas, till you hear a sound, or faucet on the wall. For best results, choose an area which is not over or beside switches, electrical outlets or any plumbing. This avoids possibly destroying pipes or any wiring. Attempt to locate a space that’s to the diagonal from from their website, if fixtures exist. Use an area which is about chest height.

Cut a hole in the region together with hobby knife or the boxcutter. Make the hole somewhat bigger in relation to the end of your crow bar. If possible, examine in the hole using a flash-light to confirm that wires, no studs or plumbing exist behind it.

Wear facemask and the safety goggles, work gloves to protect your self from dirt and dry wall parts.

Wedge the end of the crow bar to the hole and pull outward to enlarge the the area. Do this until the hole becomes broad enough for your fingers to fit through.

Put your fingers in grip and the hole the dry wall. Then pull before you tear a a bit away. Put the piece in the garbage-bag.

Continue before you tear-away the complete wall, pulling a way in the wall. If required, vacuum the floor as well as the surfaces on which the drywall was connected to eliminate any supplies that are residual. Dispose of the garbage-bag.

See related