The best way to Prune a Fuschia Plant

Leaves of fuchsias and the vibrant blooms include a blaze of colour to patios and gardens in several regions of the United States. Trailing plants and growing equally as bushes, they come with different tolerance to cool in more than 100 species. Most initially come from Central and South America, but some species are hardy to 2-3 degrees Fahrenheit. Keep your fuchsia crops shapely, healthy and bursting with flowers.

Fuchsia in springtime before the plants start to develop.

Cut off damaged and dead branches with pruning shears.

Cut off branches that cross each other in crops that are bush.

Cut back the branches to get the form you want. Prune a basket fuchsia right into a wagon wheel form, eliminating branches that develop instead of out. Cut back a plant that is bush to less or half its size, removing straggly branches close to the primary stem that is vertical. If your bush has several primary stems, cut out all but the types that are strongest.

Pinch off buds when they seem to encourage flowering and branching. Flowers develop on wood that is green.

Pinch off dead flowers on the period to inspire constant blooming.

See related

The best way to Plant Gaultheria Procumbens Seeds

Gaultheria procumbens, or checkerberry, a reduced-maintenance evergreen groundcover, thrives within U.S. Department of Agriculture hardiness zones 3 through 8. Checkerberry needs continuous dampness if developed in hotter climates and shade. Planting from seed is the effective and most frequent approach to develop Gaultheria procumbens shrubs that are new. The seeds are relatively challenging to germinate due to normal dormancy and their hard hull, therefore it’s most useful to process the seeds before planting them to aid germination.

Rub each Gaultheria procumbens seed with fine- sandpaper to weaken the hull. Before the hull assumes a whitish look rub one aspect of the seed. Soak the seeds. The following morning, drain them.

Fill 2inch starter pots with sterile, nutrient-poor seedling compost. Pack the compost to the pots to eliminate any air that is trapped. Each pot with water before the compost is saturated.

Sow two Gaultheria procumbens seeds in every single pot that is starter. Press them firmly onto the surface of the soil. Cover them using a 1/4 inch- layer of compost that is seedling. Spray the compost to to be in it.

Place the pots in outside or the fridge where temperatures remain below 45 degrees Fahrenheit, for example against a north-facing wall. Expose the seeds to winter for 30 to 60 times. Maintain mild dampness through the stratification period in the compost.

Once day-time temperatures reach 68 F move the pots into a warm location with vibrant light in spring. Shelter the pots from sunlight and salt spray in coastal locations. Water frequently to preserve dampness.

Watch in six months for signs of germination. Pluck out if both seeds germinate effectively as well as discard small of the two Gaultheria procumbens seedlings from every pot. Keep the one that is strongest.

Slowly acclimate the Gaultheria procumbens seedlings to sunlight on the course of 30 days. Increase their coverage by 15 minutes each day without wilting till they are able to stand sunlight for eight hours.

Transplant the seedlings into individual nursery containers stuffed with moderately acidic soil like rhododendron blend or a rose. Before transplanting them to the garden grow them in a container for 12 months.

See related

The best way to Germinate Canna

Canna lilies (Canna x generalis) can include a unique feel to your own garden. The decorative crops, which resemble banana trees, have paddle-like leaves, and flowers in shades ranging from oranges and yellows to reds and pinks. Native to tropical and sub-tropical locations, cannas can prosper in other regions of the United States and California, within USDA plant hardiness zones 8. While canna lilies are generally developed from rhizomes, developing them can be a satisfying enterprise.

Nick the canna seeds using a knife so water can penetrate them. Remove a few of the tough coating until the inside is displaying. As an option, rub the seeds over sand-paper to eliminate a few of the coating.

Fill a bowl with water that is warm, add the seeds and soak them for 24 hrs.

Sterilize a seed-elevating t-Ray in an answer of one part bleach to nine parts water. Remove the tray after 1-5 minutes, and let it air-dry.

Moisten sterile potting mix. Fill the seed-elevating t-Ray using the soil up to around 3/4 inch in the top. Use your fingers to press the soil.

Place a canna seed in the middle of every cell of the seed-elevating t-Ray. Cover the seeds with a 1/4 inch layer of soil. Press the soil on the seeds.

Moisten the top layer of soil with water from a spray bottle.

Cover the very top of the seed- elevating with plastic wrap that is clear to promote moisture retention. Use tape to secure the wrap.

Put the seed- elevating in a warm place to begin the germination process. Aim to get a a consistent temperature and take care of the soil moisture. Expect the seeds to germinate within seven to fourteen days.

Move the seed-elevating t-Ray into a window so the seedlings can develop. Transplant them to personal containers, when they are tall enough to handle and steady. Plant them outside after the last frost day in your region.

See related

The best way to Plant Poinsettias

Most poinsettias are relegated subsequent to the vacation period, but it is possible to enjoy the amazing Christmas colours again by planting your poinsettia in your backyard for the summer. Having a little additional treatment, lively foliage will be offered by your poinsettias in almost any area having a long, frost free growing period to your own garden.

Keep your poinsettia in a -ventilated area following water and the vacations it feels dry after the leaves start to fall.

Trim the branches that are aged and flowering shoots straight back to 3 to 4 inches shears when the poinsettia starts to develop aspect shoots. Leave at least one leaf on every branch.

Remove the poinsettia using its root ball from its existing container and place it in a container which is about 2″ bigger. Fill in across the plant using a high quality potting soil and water carefully. Place the container that is new .

Fertilize the poinsettia plant using a water soluble plant fertilizer every two months according to manufacturer directions.

Dig a hole in a well-drained location of your backyard with full-sun in the morning and afternoon shade that is partial. Plant the whole container in the hole outside when night-time temperatures become warmer than 50 degrees Fahrenheit. Fill in to the rim of the container just up across the hole.

Cut back new development any time it develops of August. Dig up the poinsettia container through the first week of October, and place the plant in a totally dark location, like a closet or garage, that’s a temperature between 60 and 70 degrees Fahrenheit from 5 p.m. to 8 a.m. each evening until late November or early December, when colour starts to display. Keep the plant in a sunny window throughout the day.

Move the poinsettia to your area that is sunny and continue to fertilize every two months until mid-December. Before the plant finishes flowering fertilize a-T half the advised a-Mount every two months.

See related

The best way to Propagate Jasminum

Jasminum polyanthum is a kind of jasmine that arises from from China. It has dainty buds that bloom in to flowers that are aromatic, white, star-like and may grow indoors or out. J. Polyanthum is a favorite among gardeners since it is a climber that is vigorous and is simple to propagate using cuttings. Choose a place to plant your jasmine, also it’s going to crawl up fences or trellises. Outdoor jasmine plants need at least four hours of sunlight per day. Indoor crops growing in pots or attractive planters choose filtered sunlight and temperatures of 70 to 80 degrees Fahrenheit.

Trim cuttings out of your jasmine plant utilizing pruning shears which were sterilized with rubbing alcohol. Pruning assists the host plant become less “leggy.” Take 4- to 6 inch cuttings from healthy plants only, ideally in the upper area of the plant. Cuttings from shoots usually root finest.

Remove buds and the leaves .

Treat the cuttings in the bottom with root-marketing compound to market effective and fast rooting. This action is optional, as the bulk of jasmine cuttings root below the proper conditions, with no use of a compound.

Choose a container where to propagate your jasmine cuttings. The container should have excellent drainage. To get a mixture, use one part perlite or sand and one part peat, in accordance with North Carolina State University. Insert the one third to one half their size to the medium. Space the cuttings several inches so that sunlight can be received by all leaves.

Before the media is moist, water the cuttings. Protect the cuttings to motivate humidity and prop-up the plastic with sticks or skewers. In this manner, the plastic doesn’t touch the tops of the cuttings. Place the coated cuttings in in direct sunlight.

Repot the cuttings into a bigger container of rooting time after three to six months. Compost any cuttings which haven’t rooted.

See related

Planting Companions for Peonies

Peonies brighten the mid and early -spring landscape using their flowers. Pick a vibrant spot to put your peonies when preparing your backyard and pick , companion crops that are helpful to develop along with them. Seek out desirable additions for your peonies’ planting location. Such crops should develop in comparable circumstances and prolong the bloom time of your backyard, camouflaging blooms once peonies die, and adding colour to the planting location.

Showy Perennials

Crape myrtles like full sunlight and well-drained soil. The crops will add a small mild shade to peonies growing in hotter climates, and develop to 25-feet tall, with respect to the range. Blooms include red, white, purple or pink colour to the landscape with this long-blooming tree, flowering from mid summer through fall. Daffodils have characteristic trumpet-shaped flowers that bloom dependably every spring on crops that range from 6 to 20-inches tall. Colours and bloom occasions differ depending on the range which is planted. Flower colors include pink, yellow, white or salmon.

Evergreen Perennials

Camellias bloom provide support for peonies. Some types bloom and the others bloom to the period that is growing. Staggering kinds of camellia along with your peonies can prolong bloom time in the backyard by offering season-long colour in addition for their shiny leaves. Plant them in well-drained, nutrient-rich soil. The long lasting white flowers and shiny foliage on Nandina crops make them a stylish companion for peonies. The shrubs that are little have foliage that changes into a reddish- throughout the drop, including autumn colour to your own landscape. They’re resistant to drought, deer and rabbits.

Long-Blooming Perennials

Its extended bloom time makes a perfect companion for peonies to the sensitive Pin-Cushion flower. Plants choose related growing conditions and bloom from spring through fall, complementing peony blooms that are showy using its tiny, lavender-blue flowers in the first section of the period that is growing and keeping looks in the planting location once peonies dieback. Geraniums aid manage weeds and lots of garden pests and provide daring colour to the backyard. Plants bloom from planting season through late drop in colours ranging from chocolates to white, lilac and pink.

Later-Blooming Perennials

You will want vibrant colour to fill the planting location after blooming is stopped by your peonies. Yarrow blooms from mid-summer until drop, with flowers in shades-of pink, salmon, red and yellow. These perennials develop to 4-feet tall with fernlike leaves. Yarrow is reduced-upkeep and certainly will tolerate drought that is moderate. Plants bloom in before blooming in drop and going dormant through the summer. The dimension of your iris depends on the range which you plant. While the others can achieve heights of 4-feet, some develop only several inches tall. Flowers bloom in colours ranging from white to black, with every shade mixture accessible.

See related

Nutshells & Composting

Compost is a vital tool for gardeners, including several nutrients needed for for plant development and enhancing soil texture. In the event that you had rather not spend for storebought related composting components or moss, you are able to make your own by nutshells, grass clippings, kitchen scraps and surprisingly — preserving leaves.

Benefits

Nutshells provide a lot of the same advantages as composting supplies. They include nutrients which are released into your garden soil, and since they’re more coarse than components, mixing them in along with your compost pile will enhance drainage and its construction. This supports the process by allowing moisture and air to flow throughout your pile.

Considerations

Nutshells do have one disadvantage: They compost gradually. Composting components breakdown to to make compost but nutshells and woody components that are related can consider to breakdown. Before incorporating them, if feasible, you need to grind or crush nutshells. This may allow them to break up quicker.

Compost vs. Mulch

Nutshells may also be used also be used as mulch. Mulch is spread on the soil surface, compared to compost, which can be mixed in with all the soil. Mulch is usually made of pine needles, bark, wood-chips and related components, and an excellent addition is made by nutshells. Nutshells and mulching materials assist control weeds, keep moisture, manage soil temperature and improve soil structure. It provides nutrients to the soil as the mulch breaks down over time.

Walnut Shells

Other portions of the tree and Walnut shells contain a chemical called juglone, which could have a poisonous impact on landscape crops and some veggies. The College of Illinois Extension bark in compost, leaves and reports the toxin will biodegrade in 30 to 40 times, creating it conserve to use tiny quantities of shells. The College of Minnesota, nevertheless suggests avoiding shells for reasons that are composting, s O be certain to consider this in to consideration in the event that you intend to use nutshells.

See related

The best way to Prevent Weeds

Gardeners usually use planters to add variety and interest for their landscapes. They allow you the flexibility to develop crops not hardy in your environment because containers may be brought indoors during winter. They’re also handy for gardeners who dislike the quantity of weed control generally required in gardens. Implement a just several weed management methods that are simple to keep these pesky weeds.

Use containers that are new or clear containers that are employed. Planters were used by rinse before use to eliminate left-over and grime weed seeds. Washing the containers with a bleach solution or warm water is the the best way method to remove damaging plant fungi, as well as small seeds.

Use clean quality planting medium. Soil that is used usually includes other contaminants and weed seeds. Potting mixes contain no weed seeds that are stay and are sterile.

Add a layer of quality mulch, including tiny or medium pine bark or hardwood bark, along with the soil. If weed seeds come in touch with all the soil, they’re less likely to germinate as the soil is shaded and cool. Like quality planting medium, quality mulch is weed-free and sterile.

Remove weeds by hand as soon as they sprout to stop an outbreak. Don’t wait till they go to seed. Pull weeds gradually utilizing a a strong grip at the end of the plant. Roots that will grow back are left behind by careless.

Monitor crops purchased from a nursery. They are able to harbor weed seeds that may spread to planters that are nearby.

Keep the location -free. Cover the ground beneath the planters with weed cloth. Gravel or bricks in addition to the weed barrier have the benefits of growing weed prevention, as well as enhancing stability and drainage beneath the pots.

A pre-emergent herbicide that’s labeled safe to your plants and efficient against the certain weeds you want to avoid. A pre-emergent herbicide have to be employed before the weeds germinate, an average of in drop or the spring.

See related

The best way to Store Rosebushes in a Container in the Winter

A gardener to to manage the grade of the soil is allowed by growing rosebushes in containers. They may be positioned wherever the gardener needs. They do well in places with restricted area; and they’re more easy to access for people with physical limitations. In containers like all crops, rosebushes require additional treatment. In colder areas, roses in containers require to be put straight in the bottom to stay warm through the winter. In areas with moderate winter months, roses may be moved to safeguard the bushes from hail-storms excessive rainfall and cool snaps.

Stop feeding the rosebushes six months before the winter season sets in, in order that they will not wear new development. New growth is very susceptible to winter injury. The absence of fertilizer encourages rosebushes to go dormant. In the same time, quit reducing dying blossoms therefore the rosehips will type. This tells the rosebush that it’s getting near the time for this to go dormant.

The rosebush containers in to a un-heated, frost free location. A garage, shed or covered patio is useful. Keep the containers watered, however don’t let them have as much as you did throughout the summer. Let the soil dry between watering. Water- stressed plants don’t survive plants which aren’t overwatered in addition to winter storage.

Pack straw to the very best of the container or moss. This helps stops the plant and helps helps maintain the roots in a constant temperature. S O each of the up right stems remain 3 6 prune the rosebush straight back with pruners -inches tall. Tree rosebushes just require their canopy cut straight back, perhaps not the trunk.

Place the tie the leading loosely across the stem, and rose container in a plastic garbage-bag. This conserves dampness across the roots. Store the rosebush containers from direct sunlight, which could warm the crops enough to break from their dormant phase. Remove moss and the plastic in the spring. Give a good soaking to the containers and set straight back them in their typical place.

See related

The Pros and Cons of Lava-Rock As Mulch

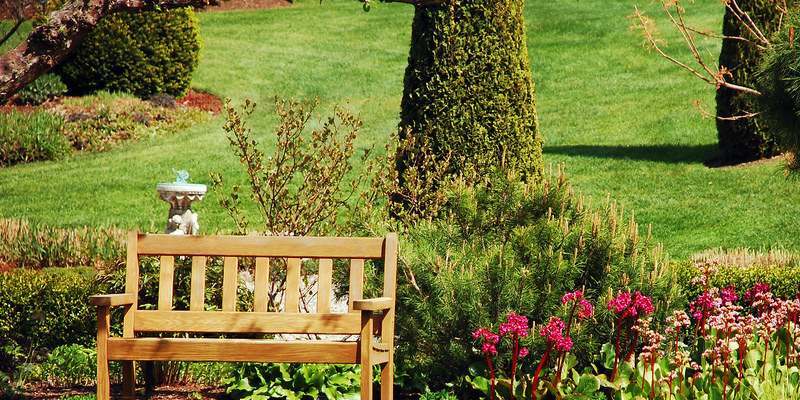
A layer of mulch, whether organic or inorganic, provides your landscape a stylish, finished look. Lava rock is one of several commercially-available mulching components that are in organic. Mulches enhance soil features or will not include nutrients to your backyard, but have the benefit of lasting longer than components that are natural. The permanence of in-organic mulches makes it essential whether a material like lava rock is a great option for the needs to weigh.

Pros for Gardeners

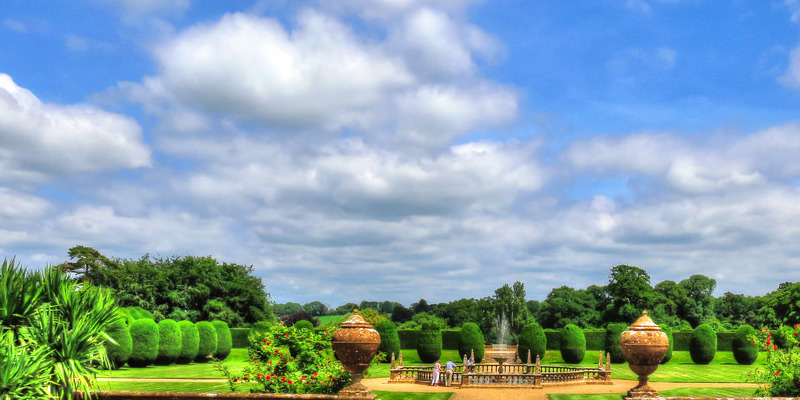
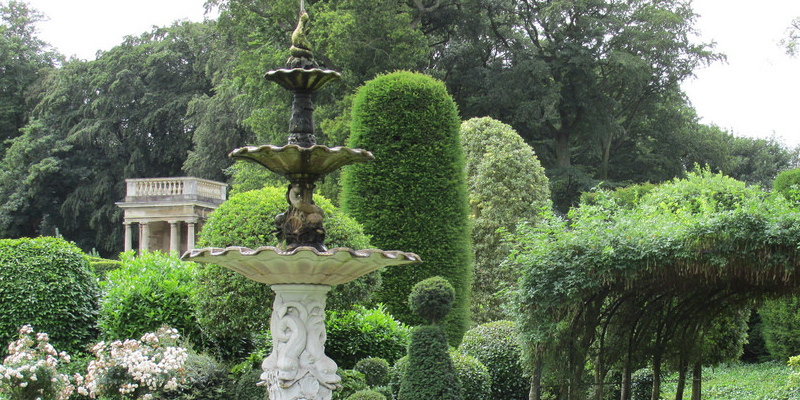
Red lava-rock called scoria is a a colourful addition to your garden; black lava-rock, which garners its visible effect from texture is also sold by some suppliers. The coloration is shaped as a result of oxidation of iron throughout eruption. A favored lava-rock, for desert landscapes works best where the terrain is mirrored by it or is created to be a stand-out characteristic, like an island bed. Relative to rock mulches, lava is light-weight, therefore cheaper to to move and less onerous for spreading to go to the backyard.

Pros for Crops

Mulching serves a crucial function in dampness and temperature moderation. Lava rock releases it at night time and absorbs heat throughout the day. Even though if times are warm mulch signifies greater temperatures, with quicker evaporation rock mulches usually gradual evaporation in the soil. Lava-rock produces an efficient weed suppressant if installed using a cloth weed barrier underneath.

Cons for Real Estate

Aesthetics are an essential element of mulching. Should you be concerned about curb appeal consider should you not like how lava-rock takes care of you have installed it as mulch — and that lava-rock might be unappealing to some, it’s expensive and hard to remove. Community vandals can also us the rocks onto surfaces to scratch graffiti.

Cons for Gardeners

Rock mulches do not break up as rapidly as natural mulches, but lava-rock can clean or blow a way if you use it in places that are exposed. New Mexico State-University Extension professionals suggest installing lava-rock at least an inch below sidewalk le Vel to decrease its movements from planting beds. Despite being light weight, mower blades can be damaged by lava rocks if items finish up in your lawn. Even when they stay where they are placed by you, lava rocks’ edges make the material challenging to work-around, therefore it’s most readily useful employed in other places or plantings where servicing tasks are mini Mal.

Cons for Crops

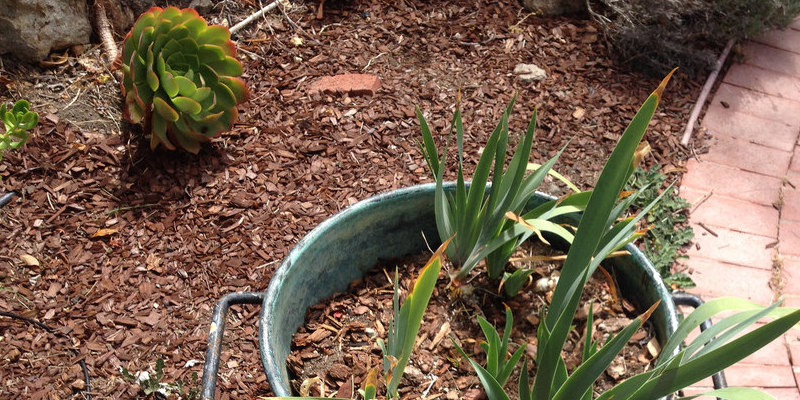
Lava rock may possibly generate an inhospitable atmosphere for crops to develop and spread, particularly if installed over a weed barrier. This kind of installation might inhibit in the event the material slopes a way in the plants, watering. Sand or soil that sifts in involving the rocks from above might interfere with assistance or watering weeds that may compete with crops.

See related