How to Remove Stains From Satin Sheets

Satin sheets could be costly and fragile, therefore it’s important to take pains when treating stains on the cloth. Not every stain-removal merchandise or method is safe for satin, or appropriate for many staining agents. Satin may be generated from silk, or can be created from smooth, glistening, synthetic fibers, such as nylon, polyester, acetate or a mix. Test the stain remover product which you plan to use in an inconspicuous portion of the sheet, such as near the bottom hem, to avoid permanent colour bleeding or chemical burning at a more prominent place.

Tannin and Disposition Stains

Eliminate a sheet using a tannin or glucose stain (such as that caused by wine, coffee or jam) from the mattress.

Lay the sheet stain side down within an old, brushed, absorbent, white towel or piled paper towels.

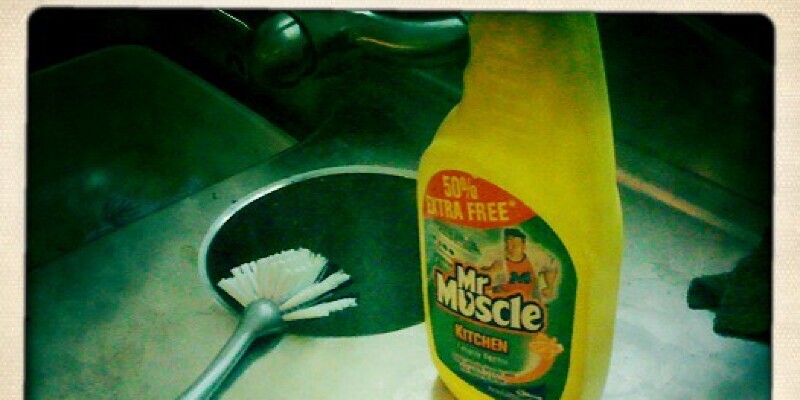
Mix 1 teaspoon of liquid dish soap or hand-washing soap 1 cup of tepid water. Add a few drops of white vinegar into the soapy water. If colour lifts from the inconspicuous test area, remix the solution, but without the vinegar.

Dampen a clean white rag using the detergent solution. Blot the stain with the rag until no longer stain color climbs from the sheet. Scrub the rag in fresh water and moist it again with the soapy water, as required.

Run cool water over the stain area to remove the detergent and any lingering stain color.

Wash the sheet as directed on the laundering and maintenance label. If the stain remains, don’t dry the sheet; even low dryer heat can place a stain. Repeat the stain removal and washing processes. Once the stain is gone, dry the sheet as directed on its label.

Protein and Starch Stains

Eliminate a sheet using a starch or protein stain (such as blood, vomit or body discharge) from the mattress.

Lay the sheet face down together with the stained area over an old, absorbent, white towel or piled paper towels.

Mix 1/2 teaspoon of enzyme-containing laundry detergent using 1/2 cup of tepid water.

Dampen a clean white rag together with the enzyme solution. Blot the stain with the rag until no longer stain color climbs from the sheet. Scrub the rag in fresh water and moist it again with the receptor mix, as required.

Run cool water over the stain area to wash out the stain-removal merchandise and any lingering stain color.

Wash the sheet as directed on its laundering and maintenance label. If the stain remains, do not dry the sheet; although the dryer’s air-dry or low-heat setting for fragile satin or silk could place a stain. Repeat the stain removal and washing processes. Once the stain is gone, dry the sheet as directed on its label.

See related

How to Clean a 10-Year-Old Front Deck Prior to Painting It

Professional painters require several important steps prior to painting a deck. Including cleaning the deck thoroughly to remove mould, mildew, dirt and other debris. Trapped debris and dirt stop the paint from fully attaching into the wood. This causes it to prematurely peel and wear off. You have to wash 10-year-old decks completely since they may have more dirt buildup on them than brand new decks.

Sweep the deck to remove most of the loose and dry debris. Most dirt on wood is dry and eliminating it all speeds up the cleaning procedure.

Mix 1 gallon of hot water with 2 tbsp gum turpentine and 4 tbsp boiled linseed oil.

Dip a scrubbing brush into the cleaning solution and wash it over the wood deck. Work until the deck is completely clean. Utilize as much cleaning solution as necessary until the deck is completely clean.

Utilize an oscillating instrument equipped with a rigid edge blade subsequently fitted with coarse grit sandpaper, to peel away then sand any pocked or muddy stains of paint, or to remove caked on debris.

Scrub the deck with clear water from a hose. Let it dry completely for many days until you paint it. If the deck is moist until you paint it, then it is going to dry off and bubble the paint up. This causes premature peeling.

See related

How to Wash Grease From Leather Upholstery

Grease can ruin your leather seat or seat in case you don’t eliminate it immediately. The grease soaks through the protective layer of coated leather and embeds itself permanently into the leather when left unattended. Nubuck or suede leather might need an over-the-counter cleansers to efficiently eliminate the grease. However, whenever you’ve got a seat or seat with a shiny leather, semi-aniline or aniline surface, then you can utilize one of 3 recipes — based upon supplies you have on hand — from household supplies to remove the grease from leather upholstery.

Talcum Powder Method

Blot the excess grease in the coated upholstered leather furniture with a paper towel or clean, dry cloth.

Cover the grease spot with talcum powder. Use sufficient talcum powder to cover the entire spot and soak up the grease. Permit the powder to sit down on the area overnight. The powder pulls grease and excess oil from the leather. If you do not have talcum powder, corn syrup works in its own place.

Eliminate talcum powder from the leather with a clean microfiber cloth.

Dampen a clean cloth. Wring out excess water. Apply a small dab — about a dime-sized number — of a commercial leather cleaning soap or merchandise onto your dampened cloth.

Rub the cloth over the spot from the management of the leather’s grain. If you cannot locate the direction in which the leather runs, rub the cleaner from the outside edges of the stain toward its middle.

Continue cleaning until the grease stain is gone. Wipe off excess cleaner with a wash rag. Blot the leather with a clean cloth.

Homemade Paste

Add 3/8 cup distilled water, 1/8 cup sea salt, 1/2 teaspoon white flour plus one tablespoon of baking soda to the little bowl after removing the extra grease with a clean paper towel or towel. Mix to create a white paste.

Dip microfiber cloth into the white paste mixture. Rub mixture onto the grease spot on coated leather upholstery working in the management of the grain of the leather. For tough stains, work the mixture into the leather with a soft, old toothbrush.

Dip a clean cloth into a bowl of distilled water. Wipe off excess paste mixture with dampened cloth. Repeat until all surplus paste is gone.

Blot dry the leather upholstery with a clean, dry cloth.

Degreasing Detergent

Pour a degreaser detergent into a little bowl around 1/4- to 1/2-inch deep across the base of the bowl. Replenish as needed. This system works best for unprotected, raw or soft leathers.

Wrap the microfiber cloth around two hands. Dip your cloth-covered fingers into undiluted degreaser. Rub the degreaser onto the leather at the direction of the grain.

Add distilled water to the spray bottle. Spray the region of the leather only rubbed with the distilled water.

Work up a gentle lather on the sprayed spot by rubbing your finger across the region. Repeat until all of the grease is eliminated. Blot the cleaned area with a dry cloth.

Spray distilled water above the blotted place. Blot cleaned spot again with microfiber cloth until dry.

See related

How to Clean Mold and Mildew in the House From High Humidity

Mold and mildew in the home can grow into a serious health hazard if left untreated. These fungi thrive in bathrooms, laundry rooms or wherever heat and moisture mix. They could lead to health problems for the house’s inhabitants, especially people with allergies or respiratory problems. While combating mould and mildew is just a simple fact of life for people who reside in humid areas, once you know how to clean and eliminate mould and mildew, then it is possible to address the problem at its source.

A Quick Clean

If furnishings and household things become moist or wet, then you need to clean them within in the first 24 to 48 hours. Waiting more than 48 hours promotes mold and mildew growth. Clean moldy surfaces with detergent and rinse thoroughly with water before allowing to dry completely. The sunlight’s ultraviolet rays also kill mould spore, so enable things to dry outdoors as soon as possible. You might have to toss out porous materials, like some forests, ceiling tiles and fabrics when they’ve severe infestations. As you easily ingest or inhale mould and mildew spores throughout cleaning, take action to limit your exposure. Wear gloves, goggles and a N95-rated face mask when working with mould and mildew. Select gloves made of polyurethane, natural rubber and other heavy duty materials to keep your hands protected

A Stronger Solution

For more tough infestations, use a beach remedy consisting of 1 cup of bleach and one gallon of water. A stiff-bristle brush efficiently eliminates fungi growth from the hard surfaces found in tubs and showers. Refrain from mixing bleach using household cleaners containing chlorine as it creates dangerous, toxic fumes. Avoid working in enclosed spaces; store doors and windows open to encourage the flow of fresh air. Do not use bleach to get regular mould and mildew clean-ups — reserve it for severe circumstances. Call in a professional mold remediation group for infestations larger than 10 square foot.

Carpets and Floors

Carpets offer you an ideal environment for mold and mildew to thrive since moisture accumulates in the carpet fibers and can result in rampant growth. Frequently launder place or throw rugs to get rid of mould and prevent new growth. Immediately place clean carpet stains and spills as they occur to stop the moisture absorption. Blot dry after cleaning to eliminate excessive dampness. Any remaining moisture from the cleaning procedure exacerbates mould and mildew growth.

Air It Out

Surplus moisture combined with heat causes mildew and mould growth. Dealing with mold and mildew becomes an endless cycle of cleansing, unless you treat the problem at its source. Fix frameless windows and leaky pipes in toilets, basements and kitchens where moisture accumulates. Open up doors and windows to let in fresh air or ventilate the moisture by turning exhaust fans in kitchen and bathroom areas. When temperatures climb — or if you reside in a particularly humid place — use air conditioners and dehumidifiers to promote dry conditions. Vent clothes dryers to divert moisture outside your home.

See related

How to Take Soap Scum off a Mirror

Soap scum isn’t confined to bathtub rings and dirty shower walls. If you maintain a mirror on your shower or splash the one over the sink when you wash your face, soap scum may build up on the glass. This oily film is a combination of soap residue, mineral deposits in water, bacteria, dirt, and the oils you wash your skin off. Luckily, even heavy soap scum comes off a mirror having a tiny scrubbing and cleanser.

Vinegar

Pour 1/4 cup white vinegar and 1 cup water in a spray bottle. Shake the bottle to mix.

Spray the mirror generously using the vinegar solution and allow it to sit for five minutes.

Wipe the mirror clean with a paper towel.

Spray some of the vinegar solution on a soft toothbrush and scrub around the inside of the mirror frame, in which the frame meets the glass.

Polish the mirror with a piece of crumpled newspaper to eliminate streaks.

Ammonia

Open the windows and turn on the ventilation fan in the bathroom. Wear a set of rubber gloves.

Mix 1/2 cup ammonia and 1/2 cup water in a spray bottle. Shake the bottle to mix.

Spray the ammonia solution on the mirror and then wipe it off with a paper towel. Repeat this step if any soap scum stays.

Spray some of the ammonia solution on a soft toothbrush and scrub across the inside of the mirror frame, in which the frame meets the glass.

Polish the mirror with a piece of crumpled newspaper to eliminate streaks.

See related

How to Wash Fireplace Mortar

Cleaning the soot off the bricks around a fireplace is tough, but getting it off the mortar between the bricks poses an excess challenge. Mortar is porous and the recessed, concave surface makes it tricky to reach. You need a strong soap and a scrub brush, but before you scrub, you should pre-treat the mortar to loosen the soot. If the fireplace is over 50 years old, you should test the bricks to see whether they can withstand the power of a scrub brush. If they can’t, it’s better to only dust them.

Dust the bricks above the fireplace with a duster and vacuum the hearth to pick up loose dust, wood chips and debris.

Wear rubber gloves to protect your hands. Mix 1 oz each of scouring powder and table salt in a bowl. Add enough water to create a paste and rub the paste into the brick using a fabric. Let it dry for 10 minutes and then brush it away with a brush.

Make an alkali and synthetic glue if you need a more powerful treatment. Shave an entire bar of naptha soap into a pot and add 3 quarts of water. Heat the solution until the soap melts, then add 1 pound of pumice and one cup of ammonia. Brush the answer onto the brick using an old paintbrush, leave it for one hour and scrub it away.

Scrub the bricks with a solution of 1/2 cup of trisodium phosphate to 1 gallon of water after you have pre-treated it with the cleaning paste.

Rinse the bricks with warm water. If any soot or greasy stains remain, wash again with the TSP solution.

See related

How to Make Linoleum Floors Smell Good

New linoleum flooring may off-gas, emitting fumes you can smell throughout the space. Pet injuries and other family mishaps may also create an older floor scent less than brand new. Remove those unpleasant odors by cleaning the ground with a vinegar or baking soda solution. Add essential oils to make the flooring smell better.

New Linoleum Smell

New linoleum flooring may emit a slight odor, similar to olive oil, for several months after installation. The glue used to hold the linoleum in place may also give off a strong chemical odor. To rid the space of these unpleasant smells, open the windows as frequently as possible. Put a box fan or window fan in one window, then drawing air out of the room. If you have another fan, place it in a window on the opposite side of the room or home, to draw fresh air into the room. Bowls of vinegar, baking soda or coffee grounds put around the room also help to absorb the unpleasant odor, making the room smell better. Keep bowls of these natural odor absorbers from young children and pets.

Baking Soda Mopping Mixture

Rather than using a store-bought merchandise to mop the linoleum, make your own cleaner that has natural odor-removing properties. Insert 1/4 cup baking soda to 1/2 gallon of warm water, stirring well. Mop the floor with it, wringing out most of the moisture, then enable the baking soda mix to sit for several minutes. Mop the floor again with clean water then. Add a few drops of your favourite essential oil, such as lemon or lavender, to create a pleasing natural scent, if you prefer.

Vinegar Odor Remover

Vinegar removes odors such as those left behind by pet accidents. Mix equal parts vinegar and water in a spray bottle to spritz certain areas after cleaning up the litter, or spray on the entire ground with a very light mist of the vinegar solution; then go over it with a soft, dry cloth. Vinegar may also be used to clean the ground — include 1/2 cup of it to 1/2 gallon of warm water in a bucket. Add a couple of drops of your favourite essential oil to make the flooring smell better.

Vital Oil Spritzer

If the flooring is already relatively clean but you don’t care for how it smells, create your personal freshening spray by mixing one or more essential oils with either distilled water or even plain vodka. Add some water or vodka to a fine-mist spray bottle, then pour five to ten drops every one of your favourite scents. Replace the lid; shake the bottle, and spritz the ground thus a light mist falls to the ground. Adjust the amount of oils in the mix until you enjoy the scent. Test the spray in an inconspicuous area first; just utilize the spray when pets and young children are out of the room.

See related

Repairing Surface Scratches to a Lacquered Table

Unless your table predates the early 20th century, then it is probably finished with lacquer. Even though lacquer is a permanent finish, it does sustain scratches — particularly on tabletops. Most scratches are not hard to figure out with fresh lacquer, but you might have a problem matching the shine of this area you repaired together with the remainder of the table. Because of this, it is often best to care for the whole tabletop, which isn’t as tough as it sounds. You may select wax, furniture polish or spray lacquer in an aerosol can, based on the sizes of the scratches.

Remove dirt in the finish by washing it with a mild cleanser, like an ounce of dish soap added to a gallon of warm water.

Repair minor scratch damage by applying a coat of paste wax. Choose a light- or dark-colored wax, based on the color of this table. Spread it generously on the finish, and buff it with a clean cloth. If you prefer not to wax your table, mix equal parts of lemon juice and olive oil in a bowl, and then rub the mixture to the scratches using a clean, lint-free fabric.

Repair scratches that have penetrated through the finish and exposed the timber by first recoloring the timber. You can sometimes do so by rubbing the timber using a nutmeat, like a pecan or walnut; the organic oils bent into the timber and darken it. You may also apply wood stain using an artist’s brush.

Level a large scratch, after coloring the wood, by sanding it gently with 320-grit sandpaper, then dabbing it by lacquer-based clear nail polish, with the applicator that comes in the bottle. The lacquer will soften the old finish, and the scratch must evaporate. You can get similar results with nail polish remover, which is a lacquer thinner.

Combine the sheen of this repair with that of the remainder of the table by spraying on one coat of clear lacquer, with an aerosol can. Make sure to spray a wet coat — the surface must be uniformly shiny after spraying. Wait two hours for the lacquer to dry before polishing or waxing the table.

See related