Guest Picks: Beautify a Toilet on a Budget

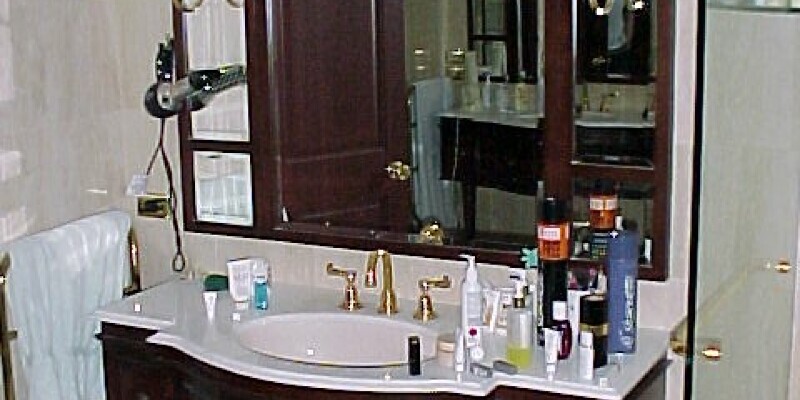
Living in a 1,500-square-foot house is no easy feat when you are a household of four. Three bedrooms, two full baths — it seemed really spacious when we were just a family. But living with two growing kids (one of whom is a tween, oh boy) who share a little bathroom which also functions as our guest bathroom is tough. Never mind our lack of cupboard space or the fact that our formal dining room has turned into a house office, the little hall bathroom requires a update! After years of talking about it, my spouse and I’ve decided to pull the trigger and perform the renovation ourselves using a budget that is as small as our residence. — Michelle from Stuttering Shell

IKEA

Lillången Sink Cabinet With 2 Doors and 2 End Parts, Aluminum – $249

After spending hours searching online and taking countless mobile phone pictures at the local home improvement store, I finally discovered the perfect dressing table for the hall bathroom remodel. The distance is small, and this sink will fit straight in. It is going to also look great too.

Crossville, Inc..

Ebb & Flow Sand and Surf Porcelain Tile

This mosaic is perfection. I adore the beachy colors, the soft expression of the sea glass and the fact that it will perfectly fit the toilet’s new flooring.

The Home Depot

Pegasus Exhibit Single-Handle Tub and Shower Faucet, Brushed Nickel – $69.03

Brushed nickel tub and shower fixtures for under $100? Sold! Plus, I really like their straight lines. The only problem now is finding a sink which matches.

The Home Depot

Pfister Vega 4-Inc Single-Handle Mid-Arc Bathroom Faucet, Brushed Nickel – $134.82

The hunt for a new sink faucet has ended! I don’t like that I am spending more on this piece than I am on the bathtub and shower fixtures, but that is a good match and undoubtedly what I am searching for.

The Home Depot

ASB Firenze 5-Foot Left-Drain Soaking Tub, White – $198

Shopping for a new bathtub insert can provide you sticker shock. Fortunately, there are a few quite affordable options out there. This is important when you’re renovating a bathroom on a little budget.

Amazon

Tropical Nautical Starfish Single Wall Towel Hook – $13.99

Sure there are a couple of hooks on the back of the bathroom door, but the new hall bathroom will require some additional towel hanging area. This starfish hook screams beachy chic, and it’ll look great in a group of three on the freshly painted walls.

IKEA

Lillången Mirror Cabinet With 2 doors and 1 End Unit, White – $90

The bathroom currently has another mirror and medicine cabinet, and it appears quite obsolete. Because the new vanity does not offer much counter space, I wish to maximize storage. This bathroom cabinet matches the dressing table and offers just a little more room with the shelves.

Anthropologie

Sea Coral Trinket Dish – $18

The bathroom cabinet has three little shelves on one side which are yelling for accessories. I adore these nautical-inspired trinket dishes from Anthropologie. I am having trouble choosing which ones to get.

Florim USA

Stratos Avorio Tile

The current bathroom floor tile isn’t my favourite, and after 10 decades of living with it, I am ready for a change. Sure, the former owner upgraded the floor from linoleum, but still. This porcelain tile appears exactly like wooden white marble. I chose 6-by-24-inch planks to the new bathroom floor.

Lowe’s

American Olean 3-by-6-Inch Bright Ice White Ceramic Wall Tile – $4.82

My existing tub/shower is old and dated, and the fiberglass insert has seen better days. Plus, its almond colour isn’t very attractive. My husband plans on laying 3-by-6-inch bright white ceramic subway tiles in the shower. We plan on dividing the white using a waterfall of the Sand and Surf mosaic tiles and an accent band around the top of the shower.

The Home Depot

Behr Premium Plus Silver Screen Interior/Exterior Paint

1 wall of my own foyer is painted in this colour. The hall bathroom is currently a mild sea glass blue colour, but I feel a fresh coat of paint will be essential when the bathroom renovations are complete. My conscience and I think that this light grey will be perfect.

Kohl’s

Sonoma Life + Style Tiburon Shower Curtain – $59.99

This shower curtain is currently at the hall bathroom. I proposed on reusing it after the renovation, but I don’t think it will work with the light grey walls. My fingers are crossed, though, since I would really like to not have to purchase a new shower curtain.

West Elm

Stripe Shower Curtain, 72″x74″, Feather Gray – $29.99

Here’s a second shower curtain alternative. I really like the bold horizontal stripes, and it mimics the appearance of the glass mosaic tile. It is very grey, but I think it could do the job.

The Home Depot

Hampton Bay 4-Light Bath Bar – $14.98

I know, I know, you are probably thinking, “Is this really the light you picked out to the bathroom?” Yes it is. The bathroom is small, and the added cabinet/mirror unit above the sink will not be recessed into the wall socket. Therefore, this type of lighting is perfect. I realize that it screams “Hollywood movie star dressing room, ” but it works. In any case, the cost (less than $15) will allow me to splurge in different areas of the bathroom remodel.

Goal

Threshold Oil Can Beach Tall Soap Pump – $9.99

A new bathroom requires a new soap dispenser. As much as I adore Method hand soaps, I believe that this beach-inspired pump is perfect for the little space. The colour reminds me of sea glass also.

Goal

Threshold Chunky Bath Rug, Elephant Gray – $19.99

This dark grey bathroom rug will contrast well with the flooring while complementing the wall colour and enhancing the tile accents. It is going to also fill the floor area in front of the toilet and shower well.

Goal

Ogie Bath Rug, White/Aqua – $24.99

Here’s another bathroom rug alternative. I like the plan and appreciate that it isn’t 1 colour, so it is going to add a bit of interest to the floor. Decisions, decisions…

Overstock.com

Easy-Install Adjustable Curved Metal 1-Inch Space-Saver Shower Rod – $32.99

One of the greatest things you can do to help a little shower/tub combo is replacing the straight, tension-mounted shower pole with a curved shower rod. It opens up so much space in the shower. My current shower pole, which is curved, is now chrome. I would prefer a brushed nickel finish to match the other fixtures in the bathroom, however when it’s not in the budget, then the chrome pole will need to do.

IKEA

Åfjärden Bath Sheet, Green-Blue – $14.99

I am embarrassed to admit this, but my bathroom towels don’t fit the bathroom’s recent decor. Over time, a hodgepodge mixture of towels has collected, and they are used by us. So what should the bathroom is blue and the towels are orange? The new bathroom cupboard will have frosted glass panels, meaning that you’ll be able to see within the cupboard. I guess it’s time to replace the towels with fresh ones at a coordinating shade.

Kohl’s

Sonoma Life + Style Matted 8-by-8 Frame – $34.99

It appears absurd to hang pictures in the restroom, but I am not a fan of sterile walls. I plan to print a few pictures from family time in the shore and hang them in the bathroom for display. I adore the appearance of this framework.

Next: 7 Tile Tips for Baths on a Budget

See related

Honeysuckle – Las Vegas Market 2013

In partnership with all and Pantone – view the digital Honeysuckle ideabook to acquire merchandise and vendor details whether you’re attending Las Vegas Market or participating from home.

Larry Hanna

Harness the tags for information:

-Mary McDonald Pythagoras pendent from Robert Abbey

-Classic Portfolio pedestal dining table, ladderback armchair and dining chairs, and sideboard from Stanley Furniture

-Pillows from Villa Home Collection

Larry Hanna

Larry Hanna

See related

Guest Picks: Bring a Clear Winner With Lucite

Lucite has had a recent comeback in transitional insides, and I love it. I feel that a room needs something to grab your attention — something just a tiny bit different to make a statement — and also a single Lucite accent does that superbly. These are a few of my favorites. — Christina from Greige

La Fabrika

Display Me Box, High Square – EUR 44

Searching for wall art without having to commit? These display boxes are excellent for displaying the items you love in any area.

Greige

Lucite Cube – $1,135

This is an enjoyable little piece that can add just a little Lucite to your area. I use one as a table, but it would make a terrific extra seat also.

Williams-Sonoma

Crystal Block Lamps – $375

These Lucite lamps are a perfect base to build upon. They aren’t visually heavy since it is possible to see them through, and they won’t compete with blending styles and colours.

Greige

Lucite Deer Antlers – $185

Easy and clean Lucite antlers create a great display piece.

Peekaboo Clear Console – $379

This is one of my go-to pieces for a small space in need of a desk or small console. It matches perfectly in just about any decor.

IKEA

Tobias Chair, Clear – $79

Easy and clean are described with this side seat. It’s perfect for the desk and dining table alike.

SpoiledRottenDogz

Crystal Lucite Pet Dish – $35

For many of you pet lovers out there, this elegant Lucite dog bowl is unconventional and perfect for your small friends.

CB2

Peekaboo Clear Coffee Table | CB2 – $279

This bit is perfection for a small space since it keeps the look light and airy.

Gretchen Everett Hardware and Home

Acrylic Curtain Pole

I adore the idea of using Lucite as drapery hardware. It’s great if you want a light and airy space, and it prevents your hardware from feeling overly heavy.

CB2

Format storage shelf – $69.95

This Lucite wall storage is equally amazing. I love it for the bath and the workplace.

CB2

Format Memo Tray – $19.95

Desk accessories in Lucite are great for keeping it light on your desktop.

Erin Condren

Acrylic Box, Mi Amor – $75

I adore the idea of picking out my own layout for a personalized Lucite box. Use the boxes for cosmetics, decorative items or storage in your kitchen.

Neiman Marcus

Jonathan Adler Sheepskin Bench – $1,729

This sheepskin bench makes a statement. The Lucite on the bottom is the number one reason I love it, but the sheepskin on the top makes it enjoyable and applicable for many spaces.

1stdibs

Lucite Bar Cart

For those of you that love the idea of a bar but do not have the space, this mobile bar cart is your new best friend. It’s a great display for all of your bottles, also it may be used for a number of functions.

1stdibs

Steer Horn Bookends

These steer horn bookends are a conversation piece. You may use them in almost any room of the home.

Horchow

‘Solid Ice’ Vanity Accessories – $140

You can not forget that the bathroom is just as significant style-wise as any other room in the home. These Lucite bathroom vanity accessories are gorgeous and permit for any colour and layout to be implemented.

Pieces

Custom Lucite Lacquered Desk – $2,350

Desks are a necessity, whether as the main piece in your house office or as a bedside table. The mix of Lucite and white accents makes this one great.

Pieces

Lucite Frames – $20

You can not have too many image frames, and these will make a great addition to some tablescape or bookshelf.

greige/Fluegge Interior Design, Inc..

Here, a Louis Ghost Chair provides a few Lucite love.

Next: See-Through Storage: Clear Choice for Maximum Space

See related

How to Remove Stains From Satin Sheets

Satin sheets could be costly and fragile, therefore it’s important to take pains when treating stains on the cloth. Not every stain-removal merchandise or method is safe for satin, or appropriate for many staining agents. Satin may be generated from silk, or can be created from smooth, glistening, synthetic fibers, such as nylon, polyester, acetate or a mix. Test the stain remover product which you plan to use in an inconspicuous portion of the sheet, such as near the bottom hem, to avoid permanent colour bleeding or chemical burning at a more prominent place.

Tannin and Disposition Stains

Eliminate a sheet using a tannin or glucose stain (such as that caused by wine, coffee or jam) from the mattress.

Lay the sheet stain side down within an old, brushed, absorbent, white towel or piled paper towels.

Mix 1 teaspoon of liquid dish soap or hand-washing soap 1 cup of tepid water. Add a few drops of white vinegar into the soapy water. If colour lifts from the inconspicuous test area, remix the solution, but without the vinegar.

Dampen a clean white rag using the detergent solution. Blot the stain with the rag until no longer stain color climbs from the sheet. Scrub the rag in fresh water and moist it again with the soapy water, as required.

Run cool water over the stain area to remove the detergent and any lingering stain color.

Wash the sheet as directed on the laundering and maintenance label. If the stain remains, don’t dry the sheet; even low dryer heat can place a stain. Repeat the stain removal and washing processes. Once the stain is gone, dry the sheet as directed on its label.

Protein and Starch Stains

Eliminate a sheet using a starch or protein stain (such as blood, vomit or body discharge) from the mattress.

Lay the sheet face down together with the stained area over an old, absorbent, white towel or piled paper towels.

Mix 1/2 teaspoon of enzyme-containing laundry detergent using 1/2 cup of tepid water.

Dampen a clean white rag together with the enzyme solution. Blot the stain with the rag until no longer stain color climbs from the sheet. Scrub the rag in fresh water and moist it again with the receptor mix, as required.

Run cool water over the stain area to wash out the stain-removal merchandise and any lingering stain color.

Wash the sheet as directed on its laundering and maintenance label. If the stain remains, do not dry the sheet; although the dryer’s air-dry or low-heat setting for fragile satin or silk could place a stain. Repeat the stain removal and washing processes. Once the stain is gone, dry the sheet as directed on its label.

See related

The Way to Repair a Shellac Finish

On occasion, one of the primary weaknesses of a shellac finish turns into a strength. Shellac is fermented on alcohol, which is part of the reason it has been partly superseded by more lasting and modern finishes. However, that very solubility makes it feasible to repair the shellac, instead of having to refinish the entire timber item. This technique is great enough for minor repairs, but anything more than that demands a fresh coat of shellac.

Inspect the shellac finish. If you only have to resolve a few tiny scratches, then proceed to Step 2. If the issues are more severe, skip to Step 4.

Twist a washcloth or dishcloth to a pad, and dip the mat into a dish of rubbing alcohol. Saturate the pad and out it.

Rub the scrape and the region around it with small, gentle, circular motions before the scratch disappears. You are dissolving and redistributing the shellac finish, so don’t wash the surface so hard that you remove instead of redistribute the shellac.

Prepare the wood for a brand new coat of shellac, if this is needed. Sand the surface lightly with a handheld rotary tool fitted with a 240-grit sanding disk or a hand sanding block with 180- to 240-grit sandpaper. It is only required to scuff the old shellac, so don’t sand with the intent of removing the shellac or the timber.

Apply a fresh coat of shellac with a paintbrush, with smooth, long strokes.

See related

How to Clean a 10-Year-Old Front Deck Prior to Painting It

Professional painters require several important steps prior to painting a deck. Including cleaning the deck thoroughly to remove mould, mildew, dirt and other debris. Trapped debris and dirt stop the paint from fully attaching into the wood. This causes it to prematurely peel and wear off. You have to wash 10-year-old decks completely since they may have more dirt buildup on them than brand new decks.

Sweep the deck to remove most of the loose and dry debris. Most dirt on wood is dry and eliminating it all speeds up the cleaning procedure.

Mix 1 gallon of hot water with 2 tbsp gum turpentine and 4 tbsp boiled linseed oil.

Dip a scrubbing brush into the cleaning solution and wash it over the wood deck. Work until the deck is completely clean. Utilize as much cleaning solution as necessary until the deck is completely clean.

Utilize an oscillating instrument equipped with a rigid edge blade subsequently fitted with coarse grit sandpaper, to peel away then sand any pocked or muddy stains of paint, or to remove caked on debris.

Scrub the deck with clear water from a hose. Let it dry completely for many days until you paint it. If the deck is moist until you paint it, then it is going to dry off and bubble the paint up. This causes premature peeling.

See related

Out Of Coming Out on a Down Comforter how to Stop Feathers

The top down comforters will lose a few feathers because the feathers’ sharp points pierce through the cover to make their escape. If a large number of feathers are coming out, or even the shedding does not stop after the first few months, it means that the cloth on your comforter isn’t properly comprising the down.

Trapped Inside

If you are planning to obtain a down quilt, then look for a single covered in cloth with a high thread count and a down-proof weave, both of which minimize the amount of feathers that come out. Also, pay attention to the sum of down and feathers filling the duvet. Down clusters, the very soft feather-like structures with no quills, provide warmth and attic, or fluffiness. Down feathers have quills and are employed as an filler. The volume of clusters that the comforter comprises, the fewer feathers it will lose. If you already have a down comforter that’s losing feathers, then insert it in a duvet cover with a high thread count and tight weave. Add a liner. Dry cleaning is recommended for down comforters. Washing a down comforter should be carried out. Do not use laundry detergent when washing your duvet since the phosphates will coat the down and prevent it from being as fluffy, like the effect of shedding feathers. Use a small number of dishwashing liquid.

See related

The Way to Fix Tiny Rips on Leather Sofas

A small rip on a leather couch is the sort of thing your eyes instantly go to after you discover the problem. Ignoring the tear isn’t a choice — abandoned as-is, it will likely grow larger as the leather stretches and flexes from everyday usage of the couch. Mending a little tear does not require calling a professional upholsterer. Particular leather repair kits that have several tints enable you to whip up a repair color that matches your sofa. If performed well, the repair might not even be distinguishable from its surroundings.

Wipe the area enclosing the harm with leather cleaner applied to some dye-free cloth. If you don’t have any leather cleaner, then spray on a drop or two of liquid dish soap onto a damp dye-free fabric, then wash out the leather. Wipe the surface down with a fresh damp cloth, followed by a dry cloth. Employing a plain fabric each time guarantees no cloth dyes bleed onto the leather.

Inspect the torn area for any loose fibers or strings. Trim away loose fibers with small scissors. If any batting or stuffing sticks out in the hole, push the cloth back down inside the couch with the tip of the scissors.

Mix some of this leather repair solution with one or more tints in an empty container as well as the repair kit. Aim to get an specific color match for your torn sofa. Many kits include a color graph and mixing recommendations. Stir the mixture until it is blended completely. Test the tinted repair material on an inconspicuous area of the couch, like under an arm or on a bottom edge. Adjust the color as necessary until you get it as close as you possibly can.

Twist in your iron near the couch. Turn it on and select a low-heat alternative without steam.

Scoop up a small quantity of the tinted repair mixture with the kit’s enclosed spatula tool. Apply a thin coating of this substance over the tear as though you’re icing a cake, then including more thin layers before the tear isn’t obvious through the liquid.

Put the leather grain paper in the repair kit feel down over the repair.

Press the metal heating tool in the kit onto the hot plate part of the iron to warm it up. When it is warm, rub on the instrument over the grain paper to create a leather feel in the correct material since it cures over the tear. Permit the grain paper to cool for several minutes, then peel it away.

See related

The Way to Use a Plant Pot with a Removable Drain Plug

A grass using a bottom drainage hole is typically one of the first things needed to grow a healthy container plant. If the container you plan to use does not have a drainage hole, most garden specialists, like those at the University of Illinois Extension, recommend creating a drainage hole. A few plant pots, however, come with a removable drain plug. With such a grass, you have a lot of choices of what to do with it.

Pull the drain plug in the grass to grow most kinds of plants. Set the plug in a secure place if you think that sometime you will use the grass for a purpose that needs the plug. Put, if desired, a mesh display or coffee filter in the grass so that the material is above the drainage hole. The mesh display or coffee filter prevents dirt from seeping out the drainage hole. Fill the pot using a potting mixture, and use the container to grow plants in a way that is best suited for their kind.

Keep the drain plug intact in the drainage hole to grow plants in a water garden. Arrange the plants in the grass, and secure them in position with about a 1-inch-deep layer of deep mud, gravel or plain kitty litter, and also called cat box filler. Then, your plugged plant bud is ready to be placed in a water garden.

Keep the drain plug in the drainage hole if you wish to utilize the plant bud for artificial plants. You also can use the grass for non-gardening functions. For instance, a big, plugged plant bud can be used to hold umbrellas in a foyer without fear of water seeping in the umbrellas and outside the pot’s bottom.

See related

Will Steam Cleaning Carpet Remove Furniture Dents?

Carpeting provides a cushy surface underfoot while protecting the ground beneath from possible scratches brought on by legs. Moving furniture on a carpeted flooring presents an issue of its dents left behind following the furniture is moved. Steam cleaning your rug eliminates those dents and indentations with little effort.

Steam Clean the Dents

A steam cleaner — your own or a leased version — removes even stubborn scrapes which don’t seem to go away when you brush them with your own hand. Follow the directions for your particular steam cleaner, then working the cleaner over the seams and the immediate surrounding area to fluff up the rug fibers back to their original form.

Manual Dent Removal Approaches

If you don’t have access to a steam cleaner, place a damp white towel over the dented area; iron it with a typical clothing iron on a low to medium heat setting. Permit the towel to set for a moment or two to permit the steam to impact the rug fibers. Iron again if some of this dent remains. For a small dent, place an ice cube over the indentation and allow it to melt. Brush the area with your hand or wipe with a sponge to fluff up the fibers.

See related