How to Plant Cucumbers Around Corn

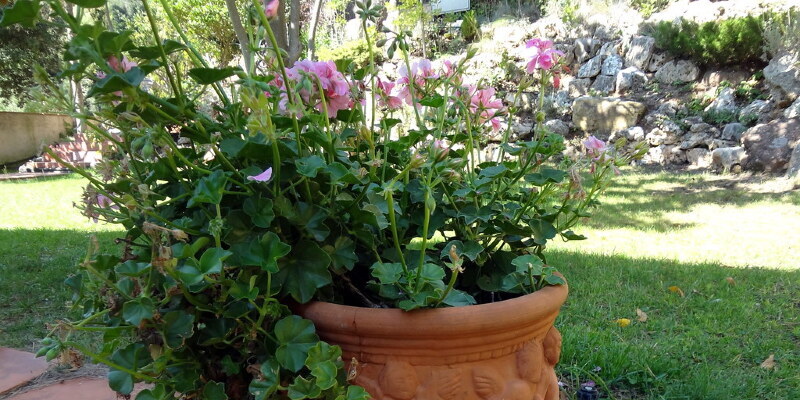
Companion planting in the vegetable garden allows gardeners with small landscapes to make the most from their limited quantity of space. This doubling-up planting process also benefits the plants by combining varieties that work well with each other. Planting cucumbers with corn provides the cucumbers with necessary colour and support while the corn receives pest protection and nutritional aid. With the right timing and spacing, then you can successfully create both of these warm-season vegetable plants together.

Pick a planting site that receives direct, full sunlight for at least six hours each day. Pull up any weeds growing on the site. Rake over the soil surface to remove debris such as twigs, dead and stone pant material.

Spread a 2-inch layer of compost over the site with a rake. Mix the compost to the top 6 to 10 inches of soil with a rototiller. Smooth the ground’s surface with a rake.

Draw vertical lines in the soil with a shovel or trowel to mark the corn rows. Space each line 30 to 36 inches apart. Dig 1-inch deep holes along each line, putting them 8 inches apart. Drop 1 corn seed into each hole. Cover each pie with 1 inch of dirt. Tamp the soil down firmly over the seed.

Water the region thoroughly using a garden hose, applying the water in a slow rate to prevent washing away the dirt covering the seeds. Keep the soil evenly moist, but not soggy, for the next seven to ten days. Watch for germinating sprouts in this time.

Plant the cucumber seeds seven to 14 days after putting the corn seeds. Mound up 4-inch tall and broad piles of dirt, spacing each mound 36 inches apart, along the eastern side of each row of corn. Space the mounds 12 inches apart from the corn rows. Pat the top of each soil mound to flatten it.

Push your hands to the soil in the surface of the mound to create a 1/2-inch deep melancholy in its middle. Put four cucumber seeds in the melancholy. Cover the seeds with a 1/2-inch layer of dirt. Tamp the soil down over the seeds.

Attach a sprinkler to the end of the garden hose. Put the sprinkler in the middle of the planting site, positioning it so that its spray of water will insure all of the hills. Run the sprinkler, moistening the soil to a depth of 6 to 8 inches.

Water the area once the top 1/2 inch of soil begins to dry. Keep the soil evenly moist, but never soggy. Apply the water in the daytime to enable the corn atom’ foliage time to dry before nightfall.

Watch for cucumber seedlings to germinate seven to ten days after planting. Thin the cucumber crops a week later germinating. Pull up one or two of the poorest seedlings, leaving two or three plants per hill.

Fertilize the plants using a 10-10-10 slow-release granular fertilizer once the corn seedlings are 8 to 10 inches tall and the cucumber seedlings begin to vine. Dig a 3-inch deep trench between a row of corn and cucumbers. Space the trench 6 inches from each harvest. Sprinkle 2 teaspoons of fertilizer each foot of trench. Cover the fertilizer with 3 inches of dirt. Water the region thoroughly. Repeat with each row.

See related

San Marzano Tomato Plants & Diseases

San Marzanos (Solanum esculentum) are somewhat favorite canning tomato variety due to their great-tasting fruit, easy-to-remove skin, few seeds, along with higher proportion of honey. San Marzano tomato crops have traditionally been developed by Mount Vesuvius near Naples, Italy, but this really flavorful tomato is now available to home gardeners in the United States. Learning about its growing requirements, plant care and disease management is the initial step in creating delicious, vitamin-rich fruit.

Description

Paste tomatoes like the San Marzano variety have a dry meaty flesh with small seed cavities. San Marzano tomato crops create deep red, crack-resistant fruit, typically about 3 ounces and 3 to 4 inches long. Initial Italian San Marzano tomatoes are box-shaped with a pointy end, whereas some hybrid varieties produce fruit that is more cylindrical. San Marzano plant height generally ranges between 2 and 4 feet, with green medium-sized leaves and yellow or white flowers.

Growing Requirements

Healthy San Marzano tomatoes require full sun, a minimum of 6 hours of direct constant sunlight a day. San Marzano plants are tolerant of most soil conditions but grow best in moist soil with a pH range between 5.5 and 7. Most tomato varieties grow best in dry hotter climates, however, San Marzano tomato plants also grow well in cool and foggy locations. This tomato cultivar is a indeterminate, or vining tomato variety that may continue to flower and produce fruit during the growing season. The time from planting to harvest these tomatoes is about 78 days. San Marzano plants are open-pollinated, so seeds will create exactly the exact same plant and fruit quality year after year.

Plant Care

Given their vining temperament, San Marzano tomato crops may require some kind of staking or cages, providing support for fruit-laden branches. Moreover, for healthy fruit growth and growth, fertilizer boosts may be required during the growing season. Water-soluble fertilizers provide quick-releasing nutrients and are generally applied biweekly, although individual product directions may vary. Temperature-controlled fertilizers release nutrients more slowly and are generally added to dirt only once throughout the growing season. If utilizing an organic product, such as a fish emulsion fertilizers, implement as instructed on product labels.

Diseases

San Marzano tomato crops have historically been sensitive to infection, and in the 1970s that they have been nearly wiped out by the cucumber mosaic virus at the Naples area. Today hybrid varieties provide some level of immunity to common diseases like verticillium and fusarium wilt. These fungal wilt diseases are observed in plant debris or dirt and are exacerbated by cool moist weather. Applying too much nitrogen-rich fertilizer can further worsen the issue. Leaf spot is another disease that plagues San Marzano tomato crops. Caused by a fungal or bacterial disease, leaf spot causes brownish or black spots on leaves. Blight could be a devastating disease to San Marzano plants, resulting in rapid deterioration, spotting and wilting of foliage. The San Marzano variety, however, has shown some tolerance to late blight.

See related

How to Restore Green Color to a Lawn in Hot Weather

Without sufficient water and fertilizer, many turf grasses go dormant within the hottest months of the year. Warm-season grasses, however, encounter their peak growth in warm weather, and it does not take much to restore their green color. Extra water and some nitrogen fertilizer will give the lawn a fast increase, and continuing maintenance helps keep the lawn from turning brown again.

Reducing Heights

Sulfur and water needs are similar for many warm-season grasses, but perfect mowing height varies by species. Reducing grass at the correct height, and only removing one-third of the entire height every time you mow, helps keep the lawn healthy so it’s more likely to produce lush green growth. St. Augustine grass (Stenotaphrum secundatum), hardy in U.S. Department of Agriculture plant hardiness zones 8 through 10, should be mowed between 2 and 4 inches high. Zoysiagrass (Zoysia spp, USDA zones 6 through 9) will best when mowed between 3/4 and 2 inches high. Bermudagrass (Cynodon spp, USDA zones 7 through 10) should be mowed between 3/4 and 1 1/2 inches high. Mowing in the higher end of the leading range increases drought tolerance. Bermudagrass has invasive trends in some places.

Fertilizing Needs

Nitrogen is the key nutrient for supporting fast, lush lawn growth to quickly turn a brownish lawn green. Application prices are determined by the amount of actual nitrogen in the fertilizers and varies by manufacturer. You can see how much nitrogen is at a fertilizer by checking the N-P-K ratio to the fertilizer package. The first number in this ratio lets you know what percentage, by weight, of the sulfur is sulfur. To continue to keep lawns green and growing, apply 1/2 to 1 pound of actual nitrogen per 1,000 square foot every four to eight weeks. Higher, more regular nitrogen applications keep the lawn producing new, green growth. For St. Augustine grass, then make sure you use slow-release fertilizer to deter insects.

Adequate Water

Even by itself, additional water may restore color to a brown lawn. When you’re employing high rates of nitrogen too, it becomes much more important to water regularly. Water moves that the nutrients into the soil so that they may be used by plants and also helps dilute nitrogen fertilizers to prevent burn the lawns. As a rule of thumb, apply 1 to 1 1/4 inches of water every week to bermudagrass and zoysiagrass, and one inch of water into St. Augustine grass. This should keep the lawn from going dormant, yet to keep the grass lush and green, you might need to water around 2 1/2 inches each week in very warm weather.

Conservation Tips

To conserve water, then you may decide to only keep the observable front yard green within the summer and let the remainder of the lawn go dormant. A dormant lawn will start growing again when the weather cools or it starts to rain, even though drought conditions might thin the lawn by splitting some grass plants. Alternately, you may choose to water only when the lawn shows signs of drought stress or the soil is getting hard and dry. This is going to keep the grass more green than brown but won’t result in a thick green lawn. If you choose to water less, make certain you also cut back on fertilizer applications since the bud won’t be growing rapidly enough to require the nutrients.

See related

Is Bleach that the Best Thing to wash Damage Off Walls?

Mold is not only unsightly, it is dangerous, and some people are allergic to virtually all varieties. And a few species of black mold are toxic for everyone. Remediation is simpler when the mold is growing on a non-porous surface, such as tile, when it is growing on a porous one, such as drywall. In both cases, though, you need to kill the mold, and bleaching it is not always the best means to do this.

Bleach Does Not Kill Mold

Health authorities recommend bleach for killing mold, but it doesn’t do this, says D. Douglas Hoffman of the National Organization of Remediators and Mold Inspectors. The main ingredient in bleach, sodium hypochlorite, is an oxidizer. It removes discoloration, giving you the belief that the mold is gone, but it doesn’t destroy the spores, meaning that the mold can grow back. Bleach does sanitize by killing a host of damaging germs, and it temporarily rids your walls of mold, but utilizing it means breathing toxic fumes, which is not required when effective alternatives are available.

Vinegar and Borax Are Safer

Two typical household items can do exactly the same task as bleach with less potential for adverse health effects are borax and vinegar. Borax is a mineral generally considered secure unless ingested, and vinegar is completely safe. Vinegar does have an unpleasant odor, however, the odor spreads fast. You can make use of these cleaners separately; mix a cup of borax using a gallon of water and spray it on the mold, followed by a spray program of full-strength vinegar. You can also produce a one-step spray solution by mixing 2 tablespoons of borax in a 1/4 cup of vinegar and adding 2 cups of warm water.

Dealing With Mold-Infested Drywall

Removing mold from tile as well as other non-porous surfaces is a simple procedure, but it can be trickier to eliminate it from porous materials, such as drywall. Mold tends to harden drywall, and once that happens, the only way to make sure that you’re rid of it would be to replace the affected drywall. When you eliminate the old drywall, spray the vinegar/borax solution on the framing; the combination sanitizes, and as soon as the vinegar evaporates, a thin film of borax remains that guards against further mold growth. A bleach/water solution also sanitizes, but since bleach evaporates, you must paint the framing to prevent further growth.

Preventing Mold Growth

Mold needs water to live, so that the best way to keep it from growing is to remove all sources of moisture. When it’s growing because of a leak, stop the leak and allow the wall dry out before treating the mold. Similarly, if the condensation and humidity are to blame, address these problems first. In the restroom and other places where humidity control is impossible or impractical, spraying the walls frequently with vinegar is one way to prevent mold from growing. Let the vinegar on the wall; then rinse and wipe with clear water.

See related

Are Grub Worms Harmful to Dogs Who Eat Them?

Canine companions eat the strangest things, including grub worms, which can be the little, 1/2-inch larvae of beetles. Grub worms themselves aren’t bad for dogs if consumed. Alas, the soils which the worms ingest and crawl through may include toxic chemicals or the eggs of intestinal parasites, such as roundworms, that can make your dog sick.

Grub Worms and Dogs

If you notice your dog is eating grub worms from your garden or the dirt featuring them, then keep him away from such areas. Grubs aren’t toxic to eat and can, in fact, be eaten safely by people and animals, but only if they’re from sterilized dirt. As the grub worms develop , they dig through the dirt they reside in, eating it as they go. If the soil comprises pesticides, bacteria, fungi or the eggs of parasitic roundworms, then your pup will probably ingest these harmful substances, also. Keep curious pooches, particularly those that enjoy eating worms or dirt, from the garden, to prevent them from becoming sick or getting infected with parasites.

Just Say No

Dogs may eat grub worms if they dig into your garden, so keep your pooch on a leash outdoors if it reveals any interest in digging in or ingesting dirt. Provide your dog food while it’s outdoors so it will not become hungry and nibble on protein-rich grub worms rather.

See related

Strategies for Master Bedrooms in Older Homes

Original master bedrooms in old residences were typically designed as little rooms which lacked adequate closet space and also shared one bathroom with other bedrooms in the house. You may change your bedroom’s footprint to a lavish master suite to accommodate the old design. Additionally, generate a fresh decorating vibe to reenergize the space with a brand new palette, suitable furnishings and decorative accents. Determine your bedroom needs and wants before you embark on a new and enhanced space.

Spread Out

Expand an old, cramped master bedroom to a modern, spacious retreat. Bump out an outside bedroom wall to enlarge the room’s footprint to a ground-level house. Layout a suite to meet your bedroom requirements, like a sizable sleeping space, walk-in closet, comfortable sitting area and conveniently attached bathroom. Or you could choose to build up rather than out. For instance, make a second-story master bedroom over a garage, porch or alternative add-on-friendly site. Knock out a wall in your master bedroom that is shared with an adjacent room to maximize the space without any exterior structural alterations.

Relocate

Sometimes it may be simpler, less costly and more convenient to just relocate your master bedroom to another room in the house. Convert a bare area of your house, like a basement or attic, into the master bedroom of your dreams. You’ll not only get the custom-finished bedroom you would like, but you’ll simultaneously create more usable floor space. Consider areas of your house that you seldom or not use — attic areas, den spaces, grown children’s former playrooms — since more spacious relocation sites for your brand new master bedroom.

Lighten Up

Make some cosmetic changes to your antiquated master bedroom to bring it into the 21st century. Apply a fresh coat of paint in a mild, neutral hue — creamy red, hardly beige, soft grey, mud white to tighten tired walls. Paint the baseboards, inside doors and window frames at pristine white to shake up wood. Use unique architectural features to improve the room’s aesthetics and function, like assembling a built-in bench inside a bay window nook or designing a research space under a low-angled ceiling. Build drawers to the base of the window bench as additional storage space for bed linens or seasonal clothing. Exchange old windows to get bigger replacements, add natural light tubes at the roof, and hang a sparkling crystal chandelier in the ceiling to brighten up the room with cheery light.

Update

Replace outdated, soiled carpet with organic wood or bamboo floors. Dark-colored, narrow boards with a glossy finish complement modern style without relinquishing the earthy ambiance. Bamboo flooring enhances environmentally friendly green decor. Install white-painted wooden blinds to update the window treatments with practical function, or hang silky floor-to-ceiling drapes to get a more lavish appeal. Give old-fashioned furniture pieces a classic, but brand-new appearance with creamy white or coal-black paint. Insert brushed chrome handles, drawer pulls and knobs to pieces to get a elegant look with transitional style. Situate a fresh vase of vibrant flowers on top of a dresser or chest to energize the space with a touch of the outdoors. Punctuate a pristine bedding ensemble with brightly hued toss cushions to get a brand new look that consumes a designer-savvy punch. Keep the bright colors to table lamps and an area rug to increase the lively atmosphere.

See related

What Color Granite Looks Best With Ivory Cabinets and Hardwood Floors?

Ivory closets have a creamy, soft surface color that coordinates with hardwood flooring and diverse granite hues. One option involves countertops in a colour wheel opposite, or complement, of yellowish ivory. Complementary granite displays cool, contrasting tones, while analogous granite hues fall on precisely the exact same side of the colour wheel since the warm tones in timber flooring and prefinished cabinetry. Granite countertops in lighting, yellowish gold set a tone-on-tone appearance, while dark granite countertops deliver tonal contrast; visual unity is made when countertops and flooring reveal the same undertone — or underlying hue.

Cool Toned Contrast

Violet-gray granite is complementary to yellowish ivory cabinetry, and in light colors, countertops in purple gray provide soft contrast. Cool, violet-gray granite offsets the warm tones of hardwood flooring. The granite’s cool tones are echoed by pendant lights and fittings in pewter, and backsplash tile in lotion and violet-gray continues the interplay of complementary colors. Bluish granite countertops provide another complementary alternative. Bluish granite has a medium tone, and it gives a fresh look with whitish ivory cabinetry, while contrasting with the orangish or yellowish tones in most hardwood floors.

Analogous Pairings

Ivory cabinetry has a warm glow that participates with warm countertop colors, especially when granite comprises goldish veining, and by adding accents in yellow ocher or orange, you create an analogous colour scheme with adjacent color wheel hues. Countertops in orange-red granite provide an alternative that links with the orangish undertone in timber flooring, and yellow-gold fixtures reiterate the granite’s yellow-gold veining. Medium, yellow-gold granite gently contrasts with ivory cupboards, and because most hardwood floors is medium in tone, it leads to a balanced look. Accents in warm olive include interest.

Light Tone on Tone

A subtle heat ensues when countertops in lighting, gold granite pair with cabinetry in light glazed. If hardwood floors is whitewashed to blend with ivory cabinetry, you create an ethereal lightness, especially when walls feature corrugated Venetian plaster. This is a tone-on-tone colour scheme, and the texture of granite countertops plays a major part. The granite’s veined texture requires focus on the brushstroke patterns on shiny ivory cabinets and discomfort marks on whitewashed flooring. A crystal chandelier reflects light, capping the room with a delicate touch.

Dark Tonal Contrast

Ivory cabinetry juxtaposes with dark granite colors, like mocha, burnt umber or medium orange-brown, and because black granite often has white veining, it provides a dark accent in kitchens and baths which feature light hardwood floors along with whitish ivory cabinetry. The gold striations at mocha granite create a connection with the yellowish undertone of ivory cabinetry, and hardwood floors stained in dark walnut restates the dark, red brown tone of mocha granite. When hardwood floors is orangeish at undertone, granite in medium orange-brown provides a balancing tone.

See related

The Way to Install Tile Wall Caps

Wall cap tiles serve a similar function as chair rail molding over a paneled wall; they complete the border instead of leaving the field tiles at an abrupt stop with no transition into the wallpapered or painted surface over it. Tile wall caps utilizes a number of supplies and the same tools since the remainder of the wall. If you did not use a saw to cut on the field tiles, then you will need one. Most wall caps’ irregular profile is almost impossible to cut directly with a dent cutter or nipper.

Lay a row of wall mounted cap tiles onto the ground with spacers between the tiles. Assess the wall in which the tiles measure and will go the row of tiles to ascertain whether a few tiles will require cuts. Cut tiles are often not, and at one or both ends of the row through the row.

Assess the row of tiles again. Apply that dimension to the wall over the field tiles, which are the tiles that cover the portion of the wall. Mark the beginning and end of the row of cap tiles on the wall with a pencil.

Mix thinset mortar in a bucket or bowl that is large according to the manufacturer’s instructions.

Thinset on the rear of one cap tile with the border of a trowel. Press on the tile against the wall over the field tiles. Spreading thinset is called back-buttering, and it avoids smearing tiles.

Steak the backs of the rest of full tiles and press the tiles against the wall. Tile spacers to get alignment between the tiles.

Assess the space from the end of the row of tiles towards the end of the wall. Measure both spaces, if cut tiles will go at both ends of the row.

Measure across one cap tile into the width required to fill the space. Mark the dimension on the tile with a pencil. If you need two cut tiles, then mark and measure the other tile now.

Transfer the fence or shield on the saw that is wet to match the area. Move the weapon 1 inch away from the blade, if you marked the tile to cut 1 inch and lock the weapon.

Put on eye protection and turn on the saw.

Set the end of the tile against the fence and push the tile into the saw bade.

Switch off the saw and wash the water off the tile with a rag. In case you’ve got another tile to cut, then move the fence into the position and cut on the tile.

Spread thinset on the rear of the cut tile and put it place at the end of the row. When there are two tiles, repeat.

Let the thinset dry for about 24 hours, then pull the tile spacers.

Mix grout in a bucket or bowl according to the manufacturer’s instructions.

Scoop up grout onto the edge of a kitchen sponge that is dense and spread it. Due to the irregular profile, cap tiles need more grout. Till they are packed full work grout into the lines with the sponge.

Wipe the excess grout off the tiles with the sponge.

Dampen a sponge that is and wash the cap tiles to remove residue. When there seems a haze on the cap tiles, buff it off with a rag.

See related

How to Apply for Foreclosure Assistance

Foreclosure proceedings can be initiated soon after you miss your first mortgage payment, however the Department of Housing and Urban Development (HUD) describes several types of foreclosure assistance that are available to borrowers in default. The kind you may be eligible for depends upon where you’re in the foreclosure process. The more time you wait to take actions to prevent foreclosure, the more restricted your choices will be.

Get in touch with your lender, a housing counselor or both before or just after you miss a mortgage payment. HUD contends that the earlier you make the telephone the higher your chances of saving your home. If at all possible, make a payment to stop yourself from falling three full payments behind, after that point the foreclosure process will already be well underway. If you’re only 30 or 60 days late, the Federal Trade Commission claims you might still be able to work out a payment plan directly with your lender and prevent a stride in foreclosure proceedings.

Consult your lender that foreclosure aid programs they participate in. As the Building Home Affordable website states, Fannie Mae and Freddie Mac loan servicers should take part in the government’s recently instituted mortgage modification plan, and other private lenders are encouraged to participate. Many significant banks provide government foreclosure aid programs as well as their own choices.

Document your case for claiming financial hardship. In case your cash problems are not temporary, a payment plan will likely not function for you. Instead, you probably ought to get into a less expensive mortgage to prevent foreclosure. A mortgage modification, wherever your lender adjusts the conditions of your loan to make a more manageable monthly payment, might work. To qualify for many alterations, including the federal government’s Home Affordable Modification Plan, however, you ought to be able to prove that you cannot make your payment moving forward.

Collect pay stubs or tax returns exceeding that your mortgage payment exceeds 31 percent of your monthly pre-tax income. Although this requirement is unique to the Home Affordable Modification Program, it’s also an affordability calculation employed by most lenders.

Consult your lender about more extreme choices to prevent foreclosure if you can’t be qualified for a repayment plan or mortgage modification. If you can’t keep your home due to unemployment or reduced income that prohibits you from making a reduced monthly payment, you may still stop foreclosure. Having a brief sale or deed-in-lieu of foreclosure, you lose your home but prevent foreclosure. In a short sale, your lender lets you sell your home for less than the balance on your loan while forgiving the gap. Having a deed-in-lieu of foreclosure, you voluntarily transfer your house’s deed to your lender in exchange for the cancellation of the remainder of your debt and wander away, according to the Federal Trade Commission.

See related

Should I Buy a HUD Home?

HUD homes can save yourself a house buyer money, but need thorough research before purchase. The Department of Housing and Urban Development oversees the Federal Housing Administration. The FHA backs mortgage loans made by private lenders to eligible borrowers to encourage affordable home ownership in the U.S.

Function

HUD insures mortgages that are backed by the FHA against borrower default option to entice lenders to give mortgages to home buyers. Borrower default happens when the borrower ceases paying the mortgage loan. A house with a HUD-insured loan that’s foreclosed on can turn into a HUD house, as stated by the Department of Housing and Urban Development. HUD pays the lender the amount of the guaranteed loan that’s owed after the foreclosure. The creditor then deeds, or transfers the possession of the house, back to HUD. HUD sells the house to recover the money paid to the lender.

Outcomes

HUD homes can have an assortment of problems related to the factors that led to foreclosure. Homes that have been left for a time period can have pest issues and serious damage from weather elements or vandalism. Damage from major repairs that weren’t done can also be a problem, such as mold out of a leaky roof. The former owners of the HUD home may have imposed property damage before moving as a reaction to the foreclosure. A HUD house can lack major fixtures, such as pipes and bathrooms, due to removal from the owner.

Benefits

HUD will have the house appraised, or assessed by an expert to ascertain the worth, before putting the property on the market. HUD homes are sold at actual value, or what the appraiser deems the house is worth in the present condition, based on HUD. The assigned value of the HUD house will reflect the investment required by the buyer to make necessary repairs. HUD offers programs and incentives to buyers of HUD houses, such as the FHA 203(k) Rehabilitation Loan, a distinctive mortgage that permits the borrower to put the cost of the house along with the estimated repair costs together in one loan. Buyers can ask HUD cover the final costs. Closing costs can climb over $1,000, and include filing fees for deeds and loan preparation fees.

Factors

HUD homes are sold”as-is,” with no warranty or guarantee about the house’s condition. HUD won’t make repairs or fix any potential problems, so a prospective buyer is invited to obtain a house inspection. The beginning of the selling period to get a HUD house is known as the offer period. Buyer must submit bids during the offer period. HUD homes that aren’t sold during the offer period are opened to all predictions, and HUD will accept the bid that makes it possible for the agency to recover the maximum money.

Misconceptions

HUD housing programs generally are geared toward individuals using low-to-moderate incomes, but HUD houses can range in cost and are readily available to any buyer who can obtain funding, irrespective of income. HUD does sell houses for $1 to housing agencies and nonprofit entities, but not to private individuals or businesses. Investors can purchase HUD homes. There is a priority period when a HUD home is available for buyers that will occupy the house, but after the period has passed, the residence is opened for investors, in accordance with HUD.

See related