Architect Lingo Decoded for the Normal Homeowner

As with any profession, structure has its own jargon — phrases even the most seasoned layperson may not know. Here are a few translations. And believe me, there could be a whole lot more.

Randall Mars Architects

“Program.” This is a word architects like to throw around a whole lot. This means a wish list — basically a written (or scribbled, drawn, recorded or other) description of what you would like and what you need and what you’re prepared to cover.

So whenever your architect says, “What is your schedule?” Send them a link for your ideabook revealing each of the items you love.

Jeanette Lunde

Parti.” No not “party.” It is short for “parti pris,” French for “to make a decision.” In archispeak it signifies the big idea behind the design of this job. While an architect may not verbalize the parti for youpersonally, rest assured that he or she has one.

The next time you sit down with your own architect for a design review, inquire, “What is the parti for the job?” Your architect will definitely get blown off by this.

Bud Dietrich, AIA

Architects typically use four different terms to break down the design phase of a job. All these are:
Conceptual design: loose, maybe freehand, sketches of a design strategy
Schematic design: more exact sketches of a favorite design
Layout advancement: selecting materials, integrating systems and describing elements
Construction drawings: the drawings that completely describe what’s needed to buildRather than getting lost in the weeds as soon as it comes to those stages, just consider these as a preliminary set of drawings or the final set of drawings. Everything up to building drawings is preliminary design, while the building drawings represent the final design.

Bud Dietrich, AIA

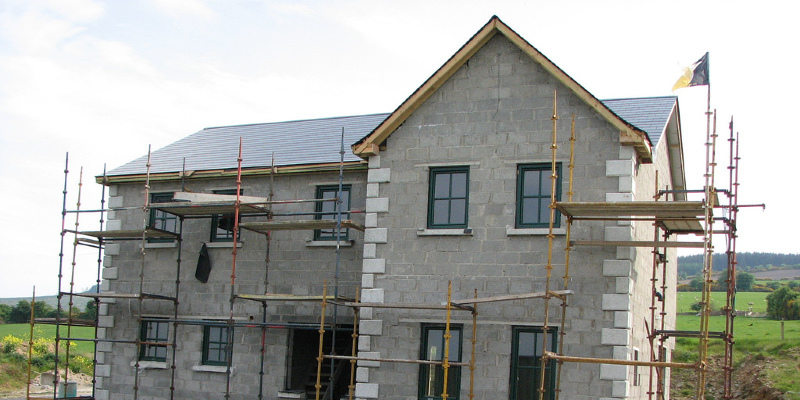
While groups like the American Institute of Architects provide a particular definition for the term construction management, it’s often one of the least understood. While a homeowner may want the architect to control or oversee the construction of the job, architects are barred from doing this because of insurance and legal issues.

But the architect has a significant role to play throughout construction. Most importantly, when issues crop up, as they inevitably do, the architect will help to keep the job on track by recommending solutions consistent with the design that everybody has invested so much effort in to produce.

LandscapeLens

“Structure.” A lot of architectural terms have multiple meanings. “Construction” is just one. When it can refer to the elements (beams, joists, columns, rafters, footings) that hold up a building, it may also refer to how a space is coordinated.

Certainly this stems from when a building’s construction was basically tied to spatial organization. But new materials and technologies have made it possible to completely separate space and structure from one another, as architects like Mies van der Rohe did.

Ciulla Design

“Spatial organization.” As a term like “spatial organization” is a little dense, it really just means the way the chambers (or spaces) in a building are arranged. If your architect tells you, “The spatial organization is en package,” ask him or her to describe what this means like you’re a 5-year-old.

D’apostrophe design, inc..

“Scale.” A scale is a triangular, ruler-like device architects utilize to determine dimensions, but it frequently refers to the way the dimensions of architectural components relate to one another.

When an architect says something like, “The scale of the building is wrong,” it generally means that the building’s size doesn’t match its environment. When a building has a “good scale,” it means that the bits are sized to correlate together.

RoehrSchmitt Architecture

“Context.” Being in context usually means that the building fits its environment not only in size but in style, proportions, materials, utilize and so forth. A building that may seem out of context to some is typically one that doesn’t fit a few, or some, of these neighboring structures.

The best way to consider about circumstance is that it’s lively. As the built environment varies, the context varies. What may today seem out of context could easily be the standard in a few years.

Smith & Vansant Architects PC

“Details.” Architects are always saying things like, “Let’s work through the details.” This is only because details are significant. Mies van der Rohe is famously quoted as saying “God is in the details.”

Though it could be daunting to work out all the details up front, it’s a whole lot less costly and time consuming to perform out them in the design development and construction drawings stages of a job.

DOWN into Earth Architects

“BIM.” One of the newest terms in the architect’s lexicon, this is short for “Building Information Modeling.” BIM is a method of drawing and designing that relies on creating a three-dimensional design of this job with every component articulated.

Does this strategy to designing reduce errors during building, but it provides clients a better understanding of the undertaking.

Coates Design Architects Seattle

“Juncture.” As Doug Patt describes in How to Architect, “Architecture is the art of placing materials together.” One of those terms we architects use to describe this is “juncture.”

How materials intersect influences the way the building will age and what maintenance issues will arise. For instance, if the juncture between the siding and also a door or window is not properly detailed, a leak causing a variety of headaches may result.

When your architect begins to talk about the juncture between materials, inquire how each will be detailed to lead to a well-crafted house.

Cooper Johnson Smith Architects and Town Planners

“Order.” In classical architecture, the order refers to whether a building is designed as Doric, Ionic, Corinthian or Composite. These design systems were first developed by the ancient Greeks and then used and altered by the early Romans.

In short, each order defined a system of proportion, scale, decoration and use. In today’s world architects modify and utilize a classical order to suit a particular design need. Adherence to strict rules about when and how to use each order has fallen by the wayside.

Inform us : What is your favourite piece of design talk?

See related

Great Design Plant: Periwinkle

Common periwinkle has become rather common indeed. The plant is extremely popular because of its capacity to rapidly cover the ground with tasteful glossy leaves yearlong. 1 plant can pay up to 8 feet.

While common periwinkle sits on the “exotic invasive” lineup, you will not have anything to be concerned about as long as you plant responsibly and keep an eye on it.

Yes, this plant is ridiculously popular, however I think of it this way: If this plant had been in high school, it would be the individual who was popular because she was nice to everybody.

Pacific Ridge Landscapes Ltd

Botanical name: Vinca minor
Common title: Common periwinkle, creeping vinca
USDA zones: 4 to 9 (find your zone)
Water necessity: Consistent moisture after first planting; does not need much after it is created.
Light requirement:Can best in dappled shade but can grow in full sun or full colour also.
Mature dimension:1 to 2 inches tall; will spread to cover large regions.
Advantages and tolerances: Tolerant of shade, sun, wet soils and drought. This is a really low-maintenance plant; after it is created, all you need to be concerned about is keeping it out of invading other locations.
Seasonal curiosity:Has evergreen leaves; blooms from mid-spring to fall.
When to plant:Historical fall or spring.

Ground One Enterprises of MN

Liquidscapes

Distinguishing traits. What makes periwinkle popular is its ability to cover large areas with glossy green leaves. They have great variation from dark green to light, based on the way the sunlight is hitting them plus they seem especially good with other evergreens, ferns and hostas.

There are lots of varieties of Vinca small that will be different in height, leaf size and colour, and flower color and size.

Julie Ranee Photography

Timothy Sheehan, ASLA

How to utilize periwinkle from the garden. Caution: Periwinkle can be invasive and spreads quickly; be liable and do not let it invade woodlands.

Now, to the fun stuff. Periwinkle is a beautiful ground cover, and its rapid spread is great when you have a large area you want to pay for. It’s very popular for base plantings and for providing a carpet of green instead to mulch or pine straw. It’s great to utilize underneath trees where grass will not grow.

Liquidscapes

Here, a rug of periwinkle borders a shady terrace.

Planting notes
Tilling the soil with peat moss will hasten the dispersing process.Space plants about 18″ apart.Soak the plants and soil.Add a mild cover of mulch.If you opted not to until using peat moss, fertilize.Water to get a month after planting. If you are weeding the region, be careful not to weed out new growth which will pop up between the original plants.Once that the plant is created, it will not require much maintenance. Just be certain it doesn’t propagate beyond where you want it to.

See related

Layout Takeaways From a Just Beautiful Swiss Hotel

My latest visit to St. Gotthard Pass — a 6,900-foot-high Alpine pass connecting the German- and also Italian-speaking parts of Switzerland — started with a tour of a former military bunker deep in a mountain that has been converted into a cultural and exhibition centre. It finished with a visit to a hospice converted to a hotel, just steps from the bunker’s exit. Contributing to the disposition of the two diverse yet connected entities (more resorts will probably be needed for the bunker’s new usage) was that the weather: Sun to the east gave way to fog, low clouds and rain at the pass.

This ideabook requires a glimpse in the prior Altes Hospiz, converted by Swiss architects Miller & Maranta into a wonderful hotel that respects the area’s history while providing modern conveniences — and a few courses for residential buildings and interiors.

John Hill

The resort’s conversion was completed in 2010, however the construction (centre) dates back, in 1 form or another, eight generations. The right side of this building, below the bottom aspect of the grey roof, is really a chapel, the most historic part of the construction. The chapel and the hospice have been rebuilt quite a few times for a variety of reasons, most recently 100 decades ago.

John Hill

Miller & Maranta maintained the construction basically as is but inserted a ground, made a new wooden structure and inserted a new roof. The last bit is the most idiosyncratic element of the design, because of its asymmetrical form, its own exaggerated dormers and the surface.

John Hill

As we round the lake in front of the hotel, the chapel’s bell tower gets visible.

John Hill

Approaching the construction, we may see the chapel entrance; the hotel entrance is on the side of this construction from this view. The roof asymmetry continues around this side as well.

John Hill

The fourth side of this building, where the entrance to the hotel is found, varies from the other three because it is one strong wall, sans roof.

John Hill

The ground-floor entrance is more monastic or just like a church than a hotel, which is fitting given the building’s history. The tiny windows appear larger because of the size of this opening on the inner face of the wall that is deep. I’ll acknowledge this photo captures only a portion of the quality of light coming in through these windows.

John Hill

A corridor that leads to the stair at the center of this building is definitely more hotel-like. The rock floor is an especially wonderful touch.

John Hill

The upstairs corridors that serve the different rooms utilize wood flooring and a similar grey wall complete. Overall the finishes are minimal, however they exude a warmth that is accentuated by the light coming in through the tiny windows. Notice the tray at the door for holding shoes.

John Hill

The device I was able to visit is a duplex that serves five people. A living room includes the entrance flat downstairs, and 2 bedroom areas are upstairs. Each surface is covered in solid wood boards, making the rooms warmer still compared to corridors.

John Hill

The stair is especially wonderful. The simple design features a good guardrail down the center of these measures.

John Hill

One of the 2 bedrooms upstairs is larger than the other, serving three people. Here we may see the new wood structure the architects included. It is apparent that the space is below the roof’s peak. Each the finishes and even the furniture pieces are simple, but the spaces are very comfy.

John Hill

Another bedroom has two beds; not observable is a dresser serving equally. We see that a little window centered in the room. The space layouts are hardly regular, fitting the asymmetrical outdoor. Inside, the design makes a calm that is a respite from the unpredictable weather of St. Gotthard Pass.

See related

An Oregon Cottage With 21 Flavors of Color

Eric and Mimi Kauffman’s 1912 cabin in Oregon is a bold reflection of the zest for life, relaxation and cuisine. Bright colors and a lush garden invite those strolling by to linger and revel in the superb aroma in the kitchen window.

The couple spent the first few decades of the marriage traveling far and wide, directed by their bohemian spirits. As it came time to put down roots, they chose Halfway, Oregon, nestled in Pine Valley near the magnificent Wallowa-Whitman National Forest.Halfway is also the gateway to Hell’s Canyon and the Snake River. This town, with a population of 350, is known for ranching, outdoor recreation and, above all, hospitality.

in a Glance
Who lives here:
Eric and Mimi Kauffman and their cat, Dottie
Location: Halfway, Oregon
Size: 1,200 square feet; 3 bedrooms, two bathrooms

Sarah Greenman

Sarah Greenman: What do you love in your community?
Mimi Kauffman: Halfway is the nicest neighborhood of individuals we’ve ever known, and we’ve lived in a great deal of places. People here take some time. You can’t go shopping. You can’t be a spectator. I can’t be as expansive within an urban area as I can here. In the city, you are so busy being busy you could forget that you are. You must have room to let your ideas come through.
Eric Kauffman: Halfway Is a Superb place. And I really like everything about our residence.

SG: What drew you to this home?

MK: I helped a friend move here in 1988. Eric and I returned every once in a while with our trailer for holidays. We came back in 1998 after having lived in Mexico for a while. We arrived on July 5 and so were moved in by mid-August. We looked in a great deal of areas, but they had acreage. We wanted something manageable.

Sarah Greenman

Mimi’s backyard garden is a cornucopia of climbing vines, flowering shrubs, potted plants and hanging baskets.

MK: I totally love flowers. I told my kids that if there is a inheritance money, forget about it. I am spending every last cent on flowers.

Sarah Greenman

The Kauffmans newly retired in the restaurant industry. They also owned and operated a location named Mimi’s on the main road in Halfway for several decades. The tile sign dangling on their porch used to decorate the front of the restaurant.

SG: What motivates your personal personality?
MK: Everything inspires me. It’s a really intuitive thing. I like color and flowers and traveling. Basically, if it makes me more happy, I really do it.

Sarah Greenman

The foyer is a large, open area with passageways on four sides. A set of French doors leads to the porch, a doorway opens to the workplace, an open breezeway contributes to the living room and a staircase extends to a family room and 2 small bedrooms.

MK: I like “workouts” I don’t like to feel trapped. It’s wonderful to know that in any moment, I could be out the door and on my way.

Sarah Greenman

A home office/music room is located just off the foyer and gives room for the couple’s many instruments. Eric plays guitar, trombone, cello and a host of other instruments. He also plays and sings in a local band called The Halfwits. Mimi is also a gifted musician and plays mandolin and guitar.

Sarah Greenman

SG: What did you do to make the home yours?
MK: Paint. The whole home was covered in a soul-sucking white. I had to eliminate it.

SG: Where’s your favourite place to shop for home products?
MK: I am a hunter-gatherer. I can’t give you resources for the things in my home, since they’re just one of a type or I can’t remember!

Sarah Greenman

The kitchen is an explosion of color. Periwinkle walls and lime-green trim are just the beginning of this eye catching space. Mimi and Eric are both amazing chefs and desired a kitchen which inspired their culinary endeavors.

MK: Can you feel there are 21 different paint colors in my residence? It’s a whole lot, I understand, but all of it seems to work. I learned to appreciate food in Thailand, and I learned to appreciate color in Mexico.

Sarah Greenman

When it’s sunflower year, the Kauffman home is always filled with bright yellow blossoms. Volunteer sunflowers have made an annual home on a wall behind the couple’s garage and keep the home in sunflowers throughout the summer.

MK: What’s a surprise. I really like the process of collecting and bringing it all together.

Sarah Greenman

A trendy, easy blue master bedroom on the second floor tempers the high energy of this kitchen below. A traditional wooden bed frame is flanked by 2 low-profile side tables; those pieces are the sole furniture items within the room. A large east-facing window overlooks the side yard.

Sarah Greenman

A narrow hall contributes to a very small bathroom, typical in size for a home this age, and a second bedroom, which Mimi uses as her studio. Even though there are four different colors of trim and two separate wall colors in the photo above, it seems to work.

Sarah Greenman

SG: what’s your favorite place in the home?
EK: Everywhere. Seriously, I really like every area within this home.
MK: Each component! I am comfortable everywhere. But if I had to choose, I’d say my own studio. My area has that special quality — when I go in there, I know I’m going to love what I am doing, whether it’s yoga or art or anything.

Sarah Greenman

Mimi’s studio is well stocked for making art. She consistently includes jars of brushes, boxes of loose and paints paper ready to go. There are little homages to Mexico throughout the Kauffman home. Bright Dia de los Muertos art hangs over her bookcase.

Sarah Greenman

Mimi also believes her studio a sacred space for yoga and meditation. A Buddha painted on fabric oversees an altar of meaningful objects. A stained glass floral motif hangs from the window and then diffuses the night light.

Sarah Greenman

When the Kauffmans moved into the cabin, they pulled an ugly chain link fence which separated them by their neighbor and planted a vegetable garden across the property line. The few now refer to their backyard as “The Park.”

The back porch is just spacious enough to house the spa. Outdoor shades roll to protect the porch from sun or snow.

Sarah Greenman

SG: What was the biggest design dilemma?
MK: The home had no garage or outdoor storage, which can be tough to get a location that gets snow all winter. We had to create a detached garage in the back of the house.
EK: We can’t get the vehicle in it right now. But it is a good place for bikes and all our extra stuff.

Sarah Greenman

The painted garage door is ornately carved and surrounded by a mossy ground cover. Whimsical fish tiles are set into the cement measure.

SG: What is the most recent home improvement project?
EK: I began painting the exterior in April of this year [2012]. I’ve just got one little remaining patch around the west side. Once that is done, I will be finished for a while.

Sarah Greenman

Renaissance girl Mimi Kauffman can often be found on her front porch enjoying the most recent issue of The Sun Magazine.

SG: Any advice for other homeowners looking to break from the color rut?
MK: You have to specify what it is you love on your own. Then step back and let the colors shine through.

telephone: Do you live in a colorful cabin? Discuss it with us!

See related

Fantastic Design Plant: Joe Pye Weed

Sometimes we dismiss a great design plant because we’re more used to watching it over the street than at a manicured backyard, or because it has the word”marijuana” in its ordinary name. Joe Pye weed is one such plant. This indigenous, frequently overlooked beauty grows up to 7 feet tall, adds showy purplish blossoms in late summer to early fall and can be quite simple to grow straight out of seeds.

Its colours and textures produce dramatic clusters and draw butterflies to the garden, and Joe Pye weed thrives in those tricky areas where water stands after a storm. Get to know Joe and decide if you’d like him to come over and hang out in your lawn.

Botanical name: Eutrochium purpureum (previously Eupatorium purpureum)

Common title: Joe Pye weed (other, more common, common names include Queen of the Meadow and Snakeroot)

USDA zones: 5-10

Water necessity: Moist. Grows nicely along ponds, wetlands and streams. Soil should be damp.

Light requirement: Full sun to light shade

Mature size: The conventional native plant can grow up to 7 feet tall and 4 ft wide, but you can find dwarf varieties available that grow to about 4 ft high, such as E. purpureum’Little Joe.’

Tolerances: Requires damp soil; can withstand hot full sun

Seasonal attention: This native plant is a late bloomer, with large, showy purple-mauve-ish blossoms. Its blossoms will continue into early fall.

Best time to plant: Fall. Joe Pye weed can be grown quite easily from seed, or even out of container crops, which are easily available in nurseries.

Interesting fact: Joe Pye weed is an herb that was mainly used medicinally for many years; some believed it inoculated individuals against poisons. One legend has it that the plant is named after a Native American called Joe Pye, who used it to heal typhus.

Barbara Pintozzi

Distinguishing attributes: Joe Pye weed (seen here amid purple coneflower) includes a wonderful all-natural appearance; it’s a native plant we frequently see in the end of wetlands or drainage ditches on the side of the street. The flowers form large clusters that have a general domed shape.

Joe Pye weed attracts hummingbirds, bees and butterflies, which will add much more life and color to your backyard.

Milieu Design

The best way to use itChoreographing fall bloomers can be complicated. But when you plant clusters of Joe Pye weed from the perennial mix, in border gardens and along wet locations, you will make certain to receive a burst of purple in late summer or early fall.

The plant’s soft colours coordinate with a wide array of foliage and blossoms, whether it be the yellows of Black-eyed Susans or goldenrod, additional colors of purple from fall-blooming asters and mums, or even a gray-green background of blue spruce. You might also want to use it with other butterfly-attracting plants like butterfly bush, coneflower or lantana.

Liquidscapes

Planting notes: There are several simple methods to plant Joe Pye weed.
Start seeds indoors in late spring and then transplant them outside in the late summer or early fall. Directly plant seeds into the soil in the fall. Purchase container plants in the nursery and plant them at the fall.If you plant out of containers, make sure that the soil never dries out for more than a day or two. Since each plant can get very large, look at the seed package or plant label to determine how much space to leave between crops.

Keep the soil damp, especially for the month following planting. You may split Joe Pye weed every couple of years. Cut the plants back to about 6 inches from the spring. To create your crops shorter and fuller, pinch them back into the early summer.

Watch more guides to good design plants

See related

To Set Your Tub

Putting your tub in the shower might be an unexpected idea, but it is a strong one and a growing trend in bathroom design.

Sure, it looks fantastic, but what does it mean from a practical standpoint? For one, children (and grown-ups) can dash all they want in the tub without having to be concerned about water damage or a mess. Two, the ideal tub model can double as a fantastic shower seat or spot to perch your leg while shaving.

Curious if that will work in your new bathroom? Take a look at these examples and find out what questions to ask your contractor prior to implementing this layout.

Stephenson Design Collective

Waterproofing is essential in these installations. Your tub is going to have a 11/2- to-2-inch drain line which will need to travel throughout your bathtub’s waterproofing materials.

Tubs in general are awkward and also a hassle to hook up, therefore there are a great deal of factors to consider here. For example: Will your bathtub’s anti-tipping mounts poke through your shower membrane? This is a good question to ask your own builder.

Sean O’Brien Architecture

If this modern tub were a tub shower, then it’d be quite hard to watertight because it’s designed as an undermount tub. Clean-lined tubs like this typically don’t have edging that connects the tub with all the wall’s safety. Placing the tub within the shower means the whole area is waterproofed, and it actually simplifies the room’s design.

Tip: A typical bathtub’s glass door and fixed panels may cost up to $2,000. I like how this shower-tub combination has a single wall panel without a door. A simple design change like this can dramatically decrease the price of your new toilet.

John Lum Architecture, Inc.. AIA

Some tubs are a struggle to get into for individuals with knee or hip issues. If that is true for you but you still want a tub, a combination like the one displayed here will assist with accessibility. This barrier-free shower lets for a tub, but the bathtub itself may still be used for years and years to come.

Tip: If you plan to clean your children in the tub, place the shower fittings so they may be used in both the tub and the shower to make items easier.

John Lum Architecture, Inc.. AIA

A built-in tub like this is really much easier to install than a freestanding one. Waterproofing supporting and behind tubs with little wiggle room can be challenging, so I suggest that clients install tubs like this, for practicality and cost savings.

Tip: Make sure your walls are waterproofed up to a height of 6 ft in your shower and tub area’s main wet zone. Waterproof the walls at least 18 inches above the tub lip in a tub with no showerhead.

There is lots to love about this particular shower. For starters, the very small ledge across the wall on the right is a fantastic way to adapt a smaller tub in a larger area, while adding extra storage.

The ground outside the tub is really graded back into the shower, therefore everything drains with ease. This is an actual wet area, and it looks great.

KADE Restoration

This bathroom’s design would have made fitting in a single dedicated shower difficult, but the bathtub was designed to serve as a walk-through into the tub. This enables the homeowner to have both a tub and a shower without combining both into a small space or squishing a bathtub into one corner and the tub into the other.

Dotter & Solfjeld Architecture + Design

As beautiful as this design option looks, there are loads of risks — particularly with waterproofing — so make sure you discuss something like this in detail with your contractor or builder. There are several ways to design a beautiful shower with a characteristic tub, however there are very few approaches to properly waterproof this particular setup. Be certain to understand all of the pros and cons prior to proceeding with your job.

Tip: Products like Noble Company’s NobleSeal TS and NobleSealant 150 are exceptional materials for seaming these difficult spots. If your bathtub layout will have a tub waste line and a tub filler which penetrates the bathtub’s waterproofing, these parts of the installation ought to be done prior to your contractor does a flood evaluation.

Inform us Would you set your tub in the shower?

More: How to convert your tub space to some shower

See related

Utility Fabrics That Move the DIY Distance

Linen, muslin, fall fabric and duck cloth are all inexpensive and versatile options that can help you revamp a room. Since these materials are usually neutral in color, are durable and can be located at many cloth, craft and hardware stores, they are fantastic for DIY jobs. Maintain several yards of your favorite cosmetics cloth on hand, and you will always be prepared when an idea presents itself.

Linen

Most utility cloths have a rougher texture, which is great for decorators and designers that are looking to add textural interest to a room. This rough linen bedding has a French-countryside feel.

Rough Linen

Linen delivers a lovely way to add a timeless touch to jobs and crafts. Fine linen can be pricey, but you can also find less expensive linen that works well for many home jobs. It’s very durable and ready to wick moisture, but it is also a material that readily wrinkles.

Try linen on your mattress for a gentle and inviting duvet cover. Its natural fibers make it a healthy and comfortable fabric choice.

Yvonne McFadden LLC

Upholster a headboard or pay part of a wall with linen to revamp a bedroom with an elegant focal point. A upholstery brads refines the appearance.

Jenn Hannotte / Hannotte Interiors

Muslin

Fashion designers usually cut their garments from muslin for a test drive before they sew their final pieces. Muslin is affordable and frequently gets lost. However, there’s beauty in this inexpensive cloth — the natural color gives it a vintage quality without the vintage price. It dyes well and is soft and comfy, lightweight, simple to sew and exceptionally versatile.

As seen with this ruffled shower curtain, muslin is excellent for all sorts of home DIY jobs. It’s a neutral base that can be enhanced with paint, dye, stitched details or rubberized.

Whimages

Fall Fabric

Drop fabric is similar in color and texture to muslin and is also very inexpensive. Muslin can be discovered at any fabric shop, while fall cloth can be purchased at a home improvement or paint shop. It’s a lot thicker and stiffer than muslin, therefore it is not the best choice for jobs with little details. Nonetheless, it’s water resistant, and its durability is a shield against rips and tears. Use it outside for backyard and patio DIY jobs, like this draped color on a gazebo .

Lauren Liess Interiors

Much like muslin, drop fabric is neutral and easy. You may choose to add depth or color to integrate it better with your decor. This talented DIYer stamped a pattern onto a big sheet of fall cloth and draped it on the infant’s crib. Initially an inexpensive utility cloth, it’s now transformed into a glamorous textile.

Mustard Seed Interiors

This is another creative use for fall cloth: upholstering furniture. Many times, conventional upholstery fabric is very expensive, so this could be an affordable and durable option. If the thought of white furniture is daunting, dye the cloth a darker color first.

decordemon

Duck Fabric

Duck cloth, that is made from cotton fibers, is also known as canvas. Like drop fabric, it is very durable, thick and stiff, making it a choice for outdoor jobs.

Although it’s not as soft as muslin, it is still simple to dye and sew. Cotton duck are available at fabric stores, and it is usually available in basic colors. The natural structure of duck cloth makes it work well as a decorative lampshade, like in this undertaking.

Tobi Fairley Interior Design

Duck cloth is water resistant, so it is ideal for a DIY shower curtain. With a curtain linertreated or treated with a waterproofing spray, then it works well anywhere in the restroom.

More:
Ecofriendly Fabrics Make the Cut

Decorate With Burlap

See related

Contractor Tips: Advice for Laundry Room Design

Laundry rooms these days are migrating upstairs in basements, in which they have traditionally sat in the majority of homes. Occasionally these rooms are little more than two appliances and a slop sink within an unfinished area. While this is a step up from rubbing against the clothes on a rock at lake’s edge, the majority of people are looking to have a better laundry experience.

If you’re upgrading your laundry space but are still maintaining it in the basement, the issues you deal with are largely about aesthetics and function — better lighting, counter area and other common difficulties. However, if you are moving the setup to upper levels, there are distinct concerns. These are heavy-duty appliances one full of water and one with warmth, so you want to be careful. This advice can help you manage this serious situation with proper care and preparation.

Lucy Interior Design

One of the first upgrades to create to a laundry room is adding counter area. Front-loading washers free up space on top of the appliance, so it’s possible to install a counter top over the washer and drier. Be certain that you leave space for those machines to move without hitting the counter top. You will want to set up wood blocking to support the counter — don’t rest it on the machine.

Gingerwood

This chandelier certainly does sparkle, but it is not practical lighting for the laundry area on its own. Fortunately, it does not have to do the heavy lifting in this space because there are recessed lighting for ambient lighting and undercabinet lighting for task lighting. Other than additional counter space, better lighting is just one of the initial upgrades you need to create for your laundry area, so you don’t end up stepping from the house with a place on your top you could not see.

Tim Barber Ltd Architecture

To make the job of moving wet laundry to the dryer simpler, make sure the washer and drier are set up so that the door swing on every is opposite, and that the door of the dryer does not get in the way as you throw clothes from one to another. When you purchase appliances, ask the salesperson when the doors could be changed easily at home when the swing isn’t right about the one you purchase.

Rev-A-Shelf

Rev-A-Shelf Fold-Out Ironing Board – $190.30

If your laundry is in a place available to see as people pass through your house — such as a mudroom — you’ll want to keep things hidden. A number of the very same things that we install in kitchens to make life simpler work in a laundry too. If you’re constructing a laundry and kitchen at precisely the same time, consider mixing the cabinet order and get accessories such as this pullout ironing board. Or use the older kitchen cabinets in the laundry and add an aftermarket pullout trash can, such as the one available at Rockler.

Style Moe Kitchen & Bath / Heather Moe designer

The nearer your laundry area is to the remainder of your dwelling, the more sound will probably be an issue. If you are building the space from scratch, then install batt insulation in the walls to decrease noise. All these are heavy appliances that move around a good deal. If the laundry is going to be on an upper floor, the floor joists should be reinforced to handle the load. Stiffening the floor will also reduce noise from rattling objects nearby.

HARDROCK CONSTRUCTION

A noise you don’t want to dismiss is what is known as “water hammer” Newer machines add little bursts of water repeatedly, and the water turning off and on can liquefy the pipes in the wall, possibly causing leaks. Should you hear a clunking sound when the washer runs, consult with a plumber until it is too late. On the exterior of the wall, a burst washer hose can flood your house in a minute, so make certain you are utilizing stainless stainless steel reinforced hoses.

Tina Kuhlmann

The washing machine itself could flow, so if you are on an upper floor, then it should be set up in a pan with a drain, as shown in this picture. Better yet, tile the floor and have a floor drain installed. This way you will be prepared for any floods and you are able to mop the floor right into the drain.

Du Bois Design Ltd

The drying rack above the sink pictured here’s a terrific way to conserve energy, but you are going to want to eliminate the moisture in the atmosphere, so install a dehumidifier or an exhaust fan ducted to the outside.

Abbott Moon

We’ve talked a lot about water, but remember there’s fire in the area too. The most significant safety concern on your laundry area is the dryer duct. A smooth-walled rigid duct, properly set up using the minimal run and fewest number of functions is critical. Be sure that the dryer isn’t pushed against the wall, crimping the exhaust. Clean your lint filter and examine the ductwork and outside socket at least once a year to get lint buildup. You’ve made your laundry area beautiful and functional — don’t let a flood or fire ruin it.

See related

Quoin

Quoins are the rock blocks used at the corners of Georgian-style masonry houses. They were traditionally granite rectangles which were placed in an alternating pattern and functioned as a structural component to load-bearing walls. Now they’re primarily decorative and produced from any number of materials. Even foam can be molded into many shapes and glued into exteriors, developing a quoin that’s a lot lighter than cast rock and much more cost effective to install.

Tommy Chambers Interiors, Inc..

Quoins were used at corners to support the burden of multiple stories and rock roofs, in a time before architects had established internal load bearing structures.

Pursley Dixon Architecture

These quoins were applied into the stucco of the house’s facade in an alternating pattern, then painted to add comparison.

COOK ARCHITECTURAL Design Studio

The quoins with this Mediterranean house resemble limestone.

Triangle Brick Company

The brickwork on these exterior corners was set to resemble quoins.

Witt Construction

Veneers made from actual stone may mimic the appearance of quoins.

Dorman Architects

Quoins are structural, adding strength to the corners of structures, like those exposed rock slabs.

Read more quoin photographs

See related

20 Tools Every Homeowner Must Have

If you adore tools or just have to stock a simple toolbox, here are the top 20 crucial items to receive your little project done. How many do you have?

Connected: 14 Power Tools for Your Home Shop

Philips screwdriver. A Philips or X-shape screwdriver is most likely one of the most frequent tools in almost any toolbox. If you have a have a handle that takes interchangeable tips, you can cover a wide assortment of screw types and dimensions.

Flathead screwdriver. A flathead or directly screwdriver is invaluable; most light switch plates utilize screws that are straight, for example. Having the right size flathead may make a difference, so begin with at least a set of three (small, medium and big ) to have the ability to handle most jobs.

Tape measure. Your tape measure is crucial for estimating material quantities, figuring out placement of items, and calculating floor plans and furniture dimensions. It is almost always a good idea to measure more than once to make certain you’ve got it right.

Level. Some folks are good at eyeballing whether something is level or not, but this tool takes all of the guesswork away. It takes only a slight mistake to create things look off-kilter.

Utility knife. From cutting paint round windows that are stuck closed into opening boxes, scoring drywall or even trimming the edges of carpeting, the applications are so many that you’ll be surprised how you ever got by without one.

Hammer. Pounding nails, pulling nails, crowbar activity, tapping items into place — it almost goes without stating why you will need hammer. A costly hammer is lightweight and long; its own leverage can help you once you take that wall down.

Putty knife. A putty knife is great for scratching dry glues and paints and for dispersing putty, paste and spackle. Possessing a 11/2-inch dimensions for scratching and a 5- or 6-inch one for spreading is helpful.

Nail collection. A nail place is utilized for hammering nail heads below the surface of the timber, so that you can then fill the hole with wood putty and sand itto create the nail vanish. This way the hammer never has to create an ugly dent in the surface you’re pounding.

Combination square. This multiuse tool may confirm 90- and – 45-degree angles for miter cuts, quantify depths and short distances, and also is great for scribing a direct line. It also has a vial to make certain that your job is level or plumb.

Pliers. The serrated jaws of pliers help with holding objects firmly, in addition to with pulling, pinching or bending metal.

Adjustable crescent wrench. There is a screw built into the mind of the wrench; turning it adjusts the size of the opening, so that it fits onto most any hexagonal nut. Turning a nut with pliers only strips the borders, making it harder and more difficult to get a good grip when tightening or loosening it.

Cable stripper. This wire stripper includes a blade for cutting cord to the proper length and several notches for scoring the insulation round wires of varying dimensions, which may then be pulled off. Wire needs to be exposed without the plastic coating to produce electrical connections.

Hex key application (or Allen key). Many screws, particularly bikes and assemble-it-yourself furniture for which a flush screw is essential, utilize hexagonal sockets. Multiple hex key dimensions can be purchased separately and the leverage on those is better, but a jackknife-style place like this provides all you need in 1 tool.

Power drill. Drilling suggests generating holes, along with a power drill is the ultimate luxury when tired hands have turned a lot of screws. It adapts not only to drill pieces to bore holes, but also to each kind of screw-head bit, making bigger projects go fast and with less muscle. Just be cautious to stop when the fastener is tight so that you do not strip the screw head. Don’t skimp on this instrument — you will appreciate having a good deal of power.

Electrical cable. A rocky, well-insulated indoor-outdoor power cable for high-amp tools can help you expand the limited cord of your tools to your job site — and it’s acceptable for yard work too.

C-clamp. This instrument may hold pieces of metal, wood, or plastic collectively once you want to paste, saw or file them. Use a thin shim between the clamp and the thing you’re working on this clamp doesn’t mar the surface.

Flashlight. Needed repairs may occur in dark, cramped spaces as well as when the power is out. Additionally, everyone loves to help by holding the flashlight for you. They do not work without batteriesso have extras on hand.

Ladder or step stool. Painting, reaching the lightbulb, shifting fittings, trimming the hedge, stringing lights, getting into the loft and a lot more activities require the aid of a ladder.

Broom and dustpan. When projects get messy, save your loved ones broom from harsh debris from having a committed set.

Music. Every job is made easier with music or talk radio. That is the reason why hardware stores sell radios, although these are more rugged, with rechargeable battery packs that may also be used on your cordless tools. More rocky means when you drop your hammer onto it, you simply pick it up and return to work.

More: 14 Power Tools for Your Home Shop

See related